
Tips and Tricks for Varnishing
EDITOR’S NOTE (4/26/23): Please note that Polymer Varnish has been discontinued and replaced with Gloss Waterborne Varnish. You can read more about it here.
Mirjam Hintz completed her MA and Professional Doctorate studies in Conservation with a focus on painting from the University of Amsterdam. She is the newest member of our Materials and Applications Department, providing technical and product support for Golden Artist Colors in Europe. She lives in Frankfurt Germany.
Varnishing can be a daunting task and much can go wrong during the undertaking. This article describes useful varnishing tips and tricks that I have learned throughout my training in painting conservation. By sharing these I hope to help some artists to avoid mishaps and maybe even encourage artists to try alternative application methods that can produce some subtle sheen differences. Spray application of varnishes is not discussed in this article but will be the subject of a future post.
VARNISHING – YES OR NO?
In short, varnishing is mostly an aesthetic decision. Varnish evens out gloss, saturates colors and determines the final sheen of a painting. It also provides protection to the paint layer from dust, air pollution, abrasion during surface cleaning, and if the varnish contains UV-light stabilizers, protection from light-induced color changes. Some paintings benefit from varnish while others are impacted negatively. Those paintings that lose are the ones that depend on the nuanced differences and interplay of different sheens that a varnish could take away.
Before choosing to varnish one should have clarity about the following questions:
- Is the painting truly finished?
- What would be the ideal finish for the painting?
- Would a unified surface sheen enhance the aesthetic of the painting?
- Will the painting require protection from sunlight in the location where it will be hung?
TIPS FOR MENTAL PREPARATION
- TIMING
Blocking ample time for the undertaking can help calm the nerves. When using solvent-borne varnishes I always like to leave the room after varnishing, even if it has good ventilation. So I make sure I have nothing else to do in the room after varnishing. One should varnish at least two weeks before the painting will be handled or shipped.
- VARNISH CHOICES
GOLDEN offers two different types of varnish in three different sheens: Gloss, Satin, and Matte. The first type is the solvent- based GOLDEN MSA Varnish, along with its aerosol version, Archival Varnish, and the other is our water-based Polymer Varnish. All the varnishes contain UVLS (Ultra Violet Light Stabilizers), which help protect against fading due to UV exposure. As a general rule, oil paintings and watercolors should be varnished with MSA or Archival Varnish, while acrylics are usually compatible with any of the three. Texture also plays a role. Paintings with a lot of impasto or rough textures such as Pumice Gel, should be spray varnished, either with the aerosol Archival Varnish or with the MSA or Polymer Varnish diluted and applied with a spray gun. All GOLDEN Varnishes are removable for conservation purposes. For acrylic paintings, an isolation coat is recommended. This is a clear acrylic film that acts as a permanent barrier between the paint layer and the varnish, protecting the paints or pigments during the varnish removal process. Isolation coats can also even out differences in the absorbency of the ground and paint layers. This way an isolation coat creates a more even sheen in the subsequent varnish layer, regardless of whether the varnish has a gloss, satin or matte finish. See the Isolation Coat Tech Sheet for detailed information: https://www.goldenpaints.com/technicalinfo/technicalinfo_isolationcoat.
TIPS FOR PRACTICAL PREPARATION
- SOLVENT SENSITIVITY TEST
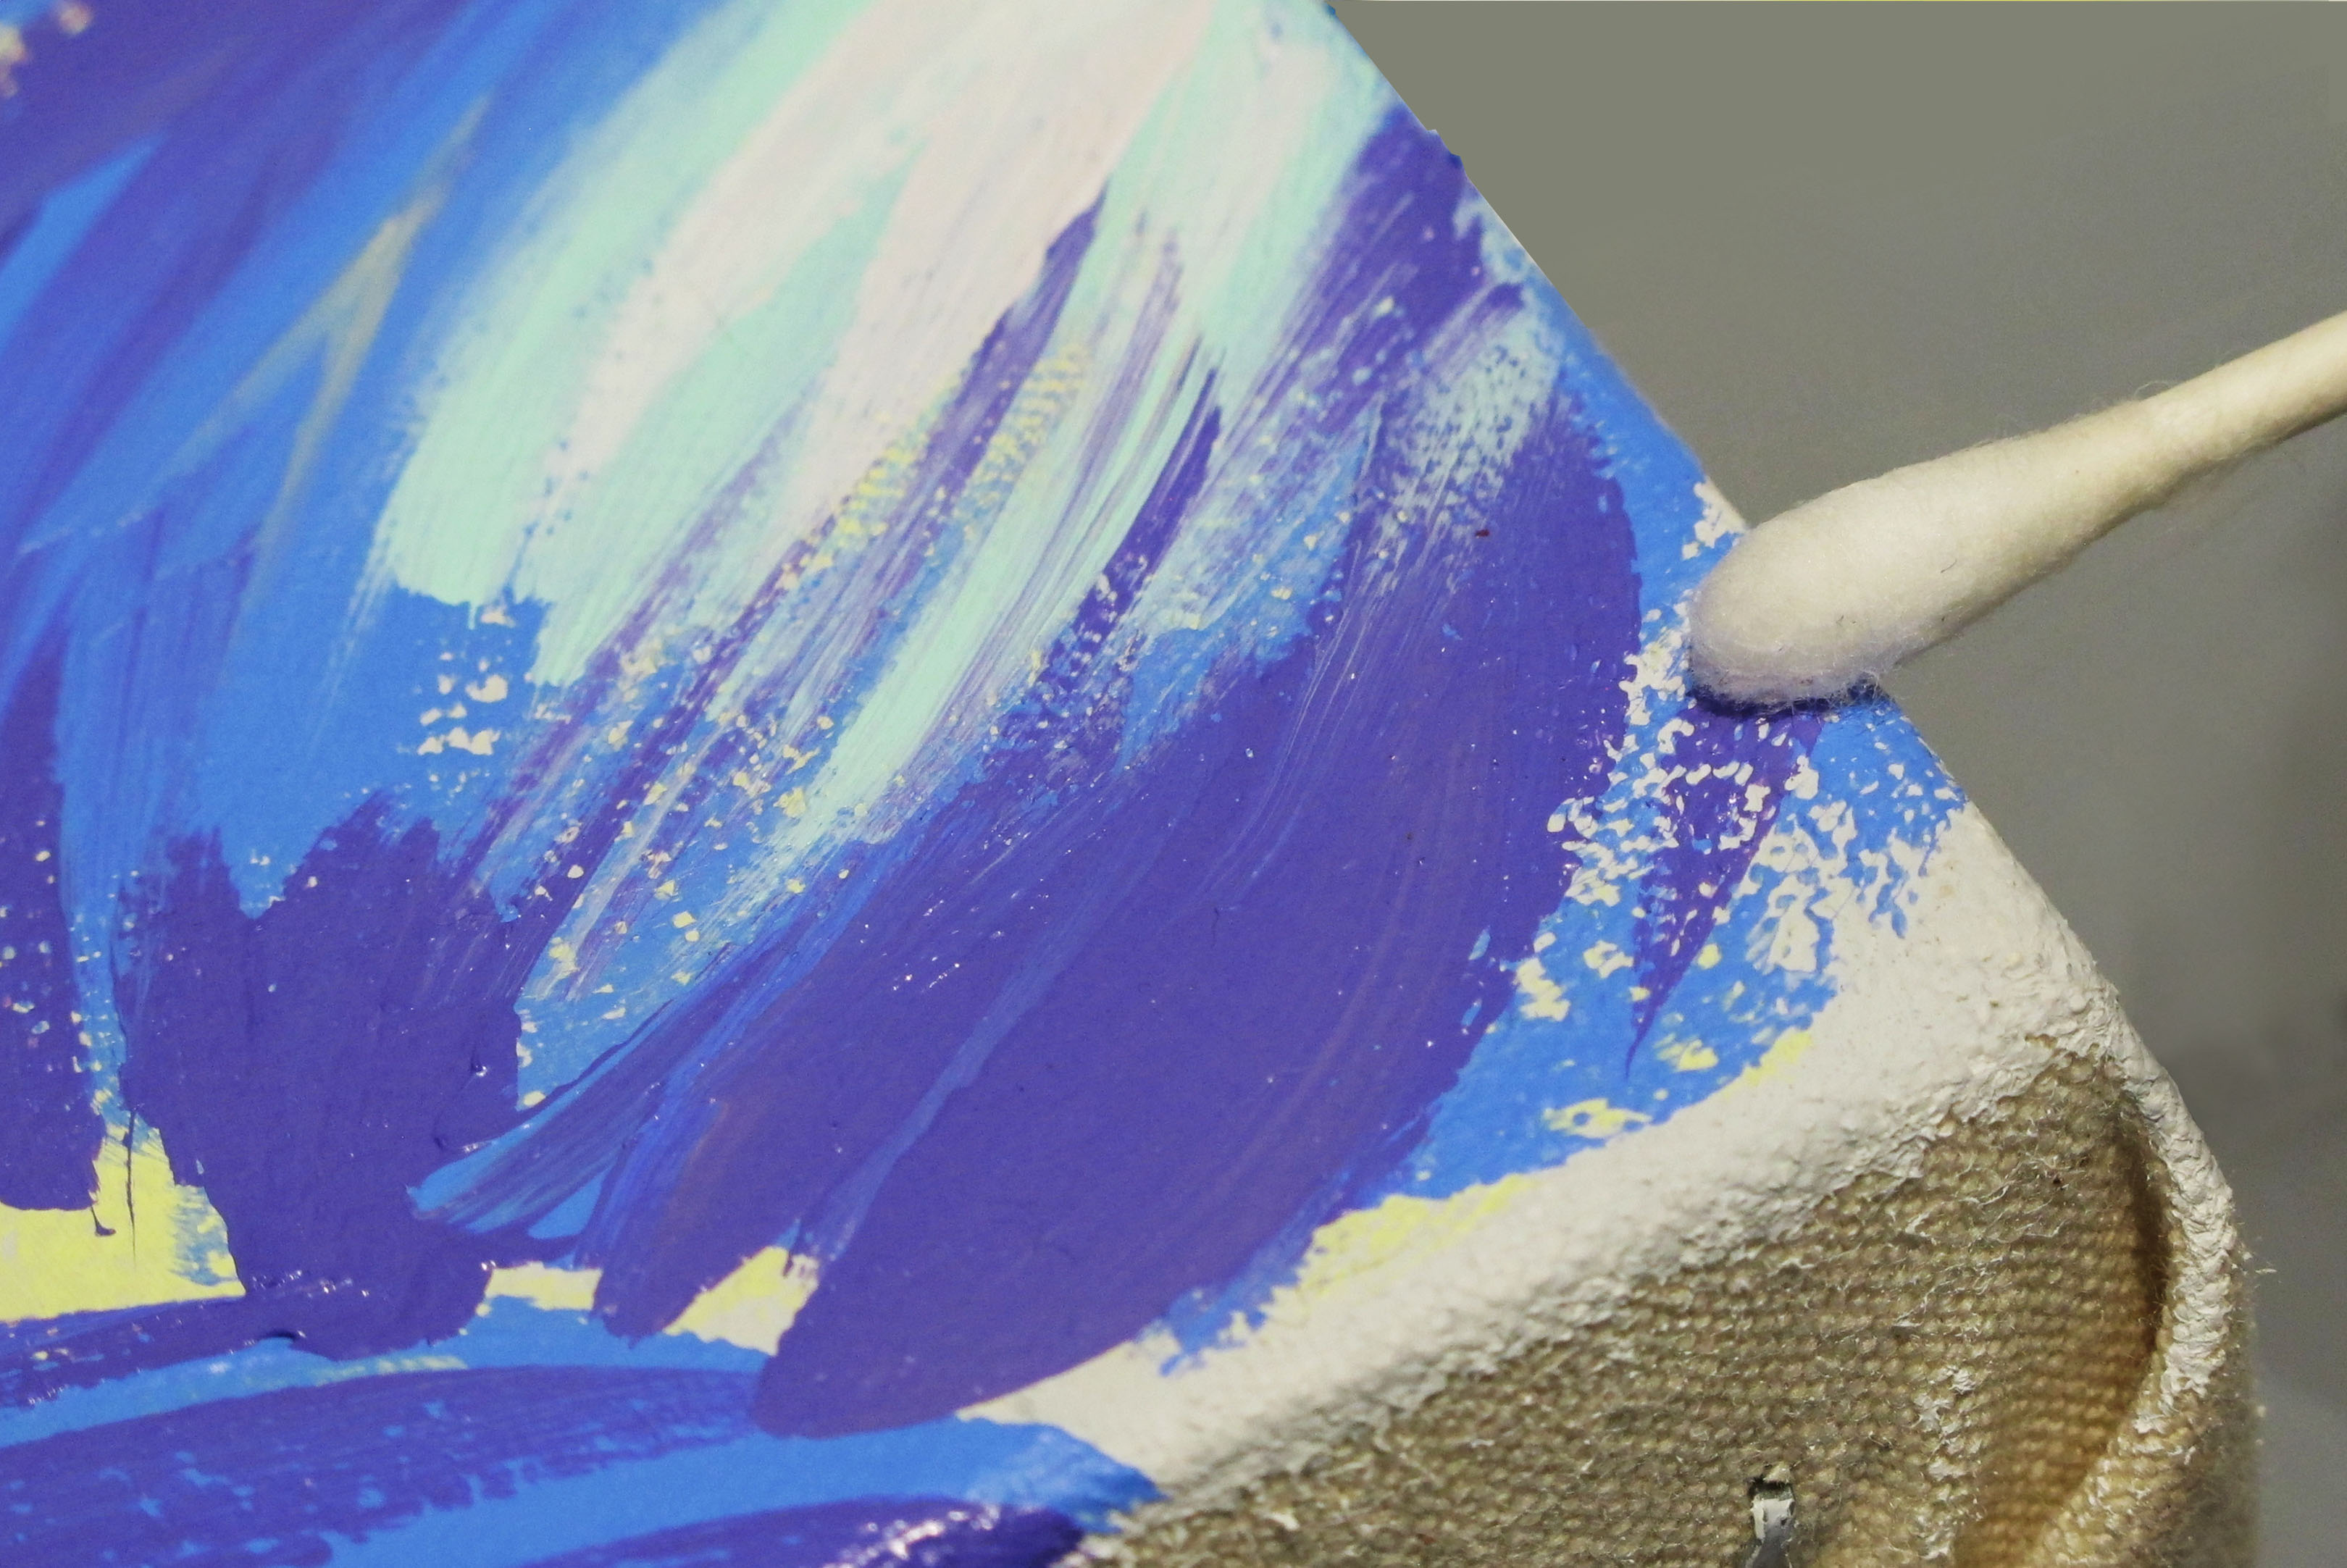
It is important to establish whether the painting is sensitive to the solvent the varnish is dissolved in. For Polymer Varnish that would be water, while for MSA that would be our MSA Solvent, which is a form of full strength mineral spirits. To do the testing, moisten the tip of a cotton swab (Q-tip®), or a strip of folded-up tissue paper, with either distilled or clean tap water, or MSA Solvent, depending on which varnish you plan to use. Then roll/swipe it gently over the various colors in the painting, first testing along the edge (Image 1). Check the cotton swab or tissue for pigment lift. If no pigment is removed, then the paints are not sensitive and varnishing can be carried out. If paint was removed only after prolonged solvent contact both brush and spray application should be possible. Otherwise, spraying might be the only option. Should the paint prove to be very sensitive there could be some pigment lift, or in extreme cases, even smearing of the paint while brushing on the varnish.
- COLOR SHIFT
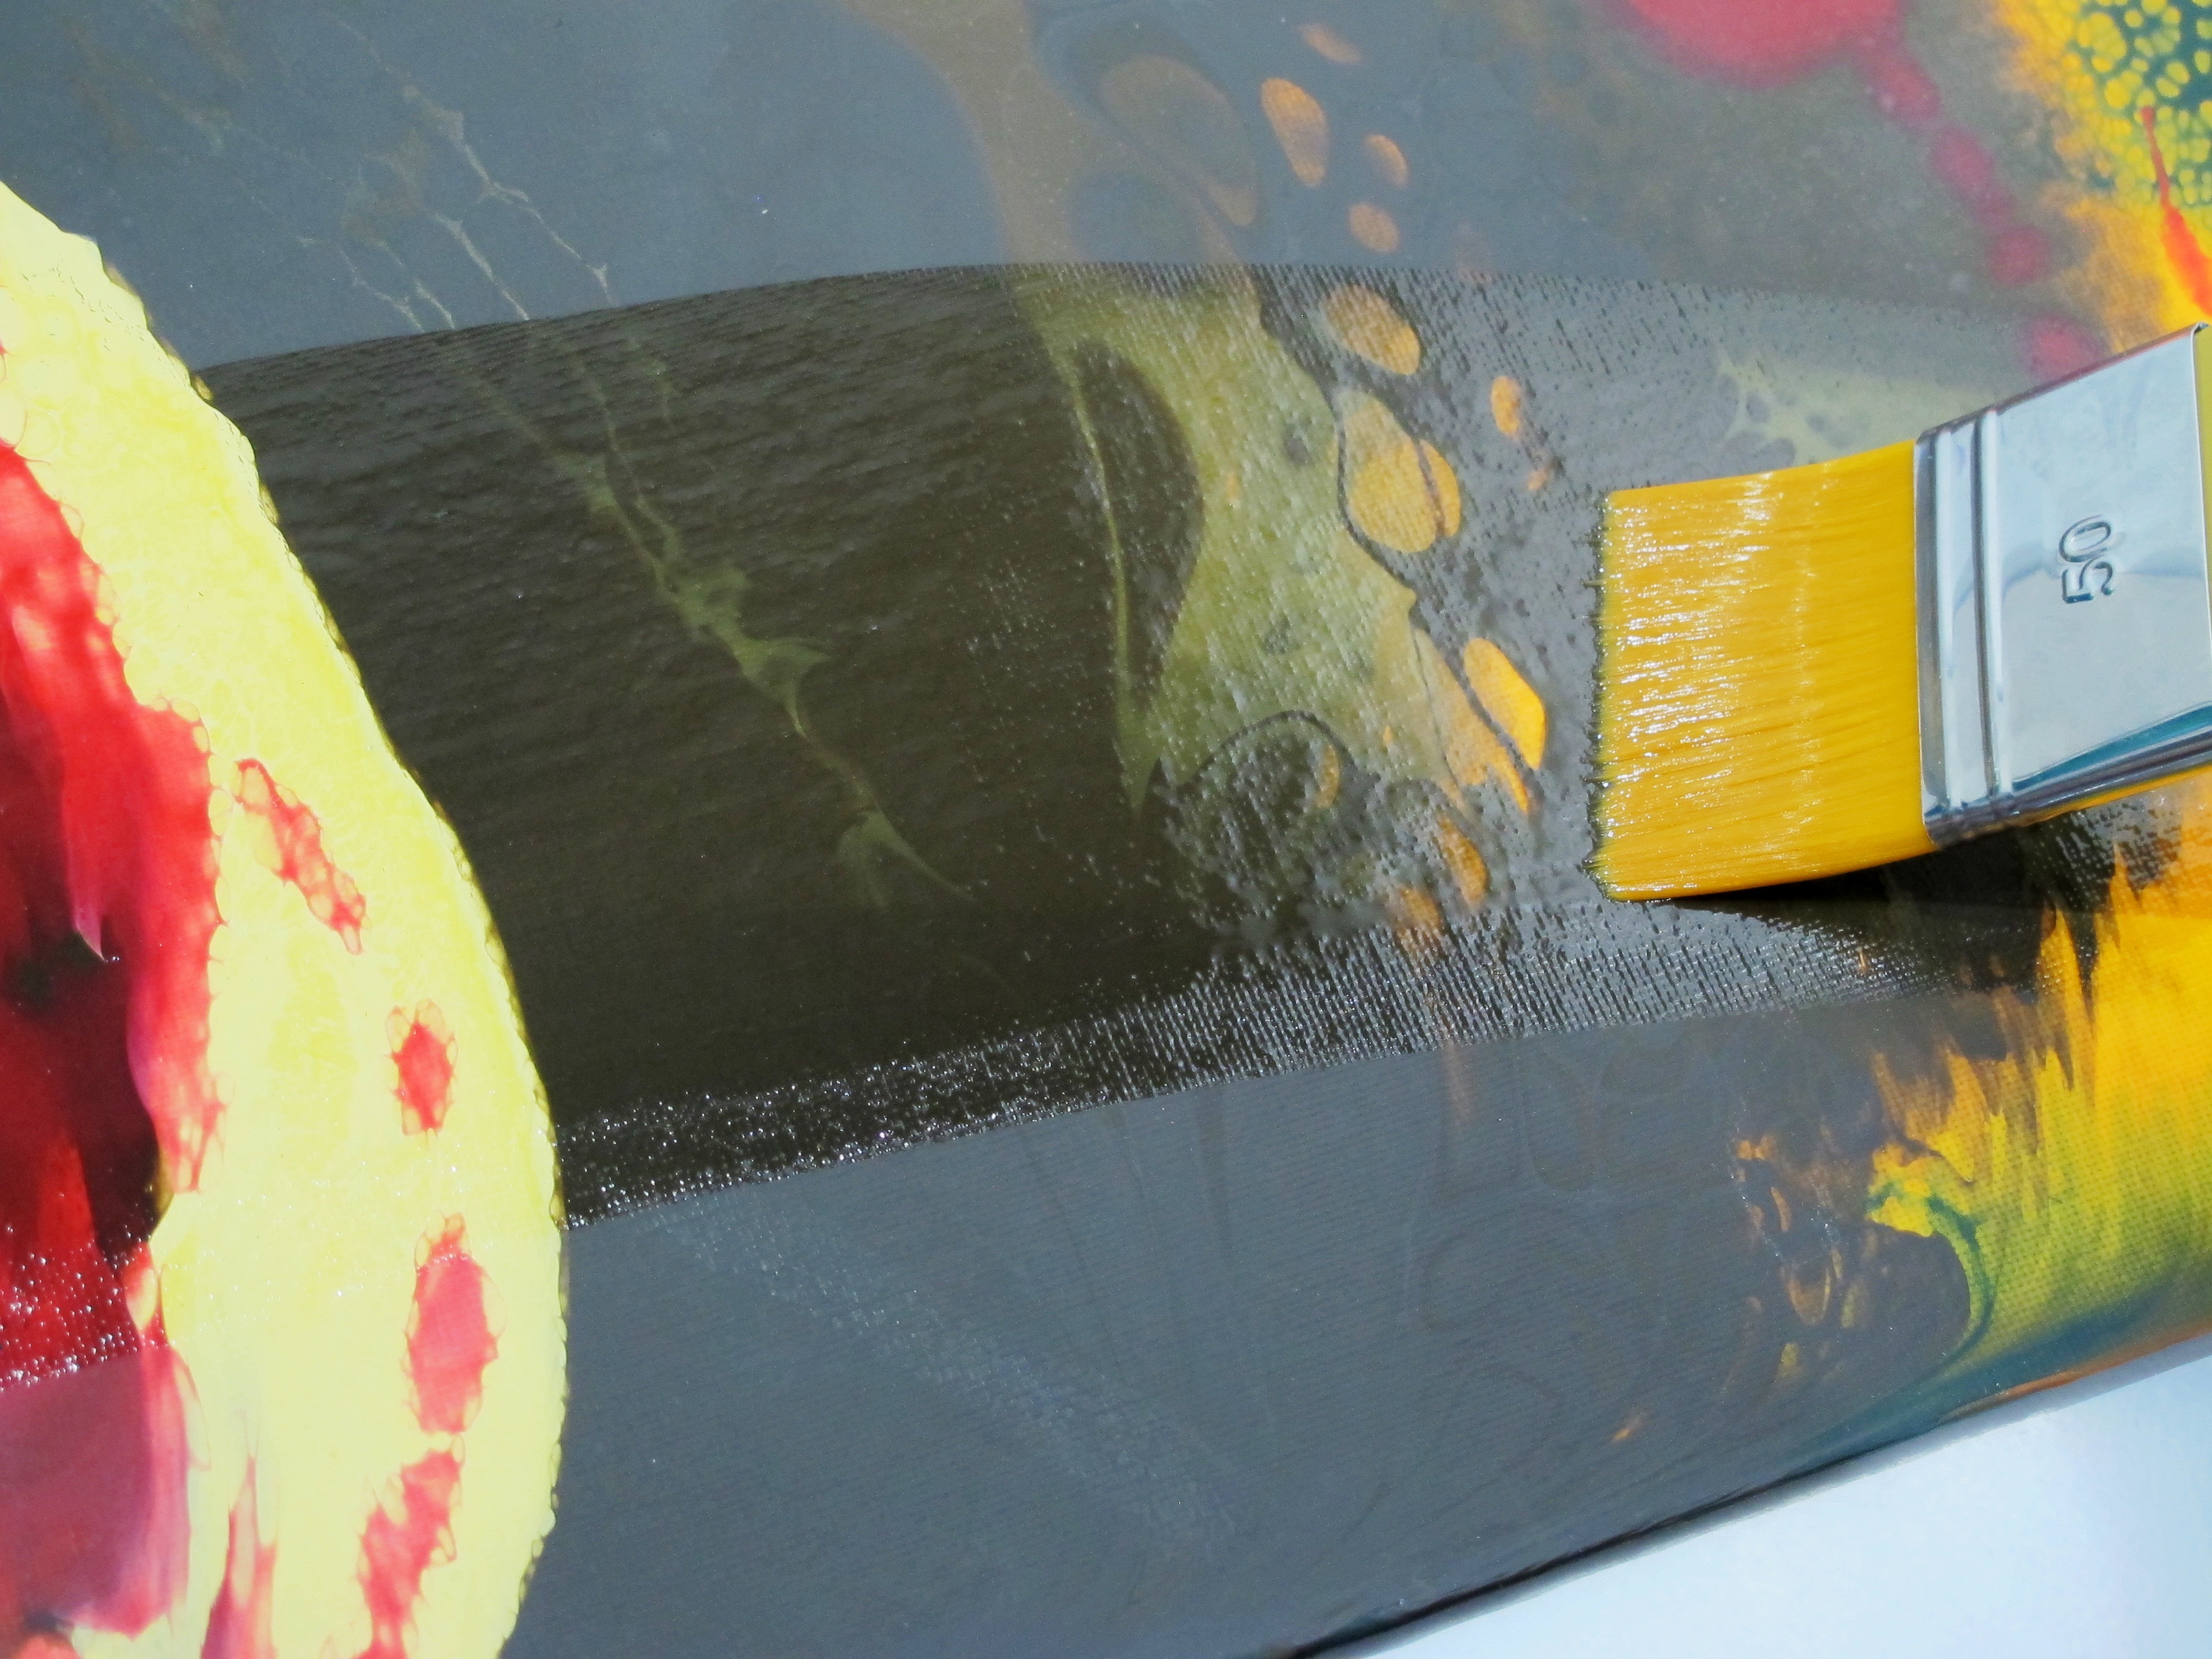
Varnish will change a painting’s appearance. Gloss varnish will saturate the colors, causing a slight shift in values. A good way to mentally prepare for that is by saturating the whole or part of the painting with a clean soft brush and some odorless mineral spirits or water, assuming that the solvent sensitivity test showed no color lift. The solvent will evaporate within a few minutes, but while the painting is wet it shows quite closely what the painting will look like with a glossy varnish (Image 2). The matting solids in a matte varnish, on the other hand, will cause a different color shift, with dark colors looking lighter and the overall colors possibly appearing ever so slightly milky. Saturating a small painting with solvent or water might be an option for artists who need to take a photograph of their work but do not have time to varnish beforehand. Or maybe they want to continue painting and just need a quick sense of how the colors appear when either wet or glossy.
- DRY CLEANING
Dry cleaning with a clean soft brush or a soft lint-free cloth might seem to be a pretty obvious thing to do before varnishing, but in the excitement to get the job done it might be forgotten. This way no unwanted dirt, hairs etc. get trapped in the varnish or isolation coat.
- BACKING BOARD
When applying varnish to a stretched canvas that is laying flat, for instance on a table, it should be backed with some sort of rigid support, e.g. foam board or cardboard. This is especially important for paintings that have a crossbar in their stretcher system. The backing board should carefully be slid in-between the crossbar and the canvas. This helps avoid the pooling of varnish towards the center.
- DRY RUN & TEST PIECE
This might feel awkward, but really helps reduce nervousness and mishaps. After having gathered all the obvious tools, and it seems all is ready for action, try making a dry run. Act as if you dip your brush into your bowl of varnish, maybe blot it on some lint-free tissue paper or cloth, and pretend as if you are now applying the varnish on the painting. This helps to build a little muscle memory and prepares you mentally. Maybe now you notice that you need better light, or tweezers, or a stool because you cannot reach the top of your very tall painting comfortably and in a controlled manner.
TIPS FOR VARNISH APPLICATION
- BRUSH APPLICATION
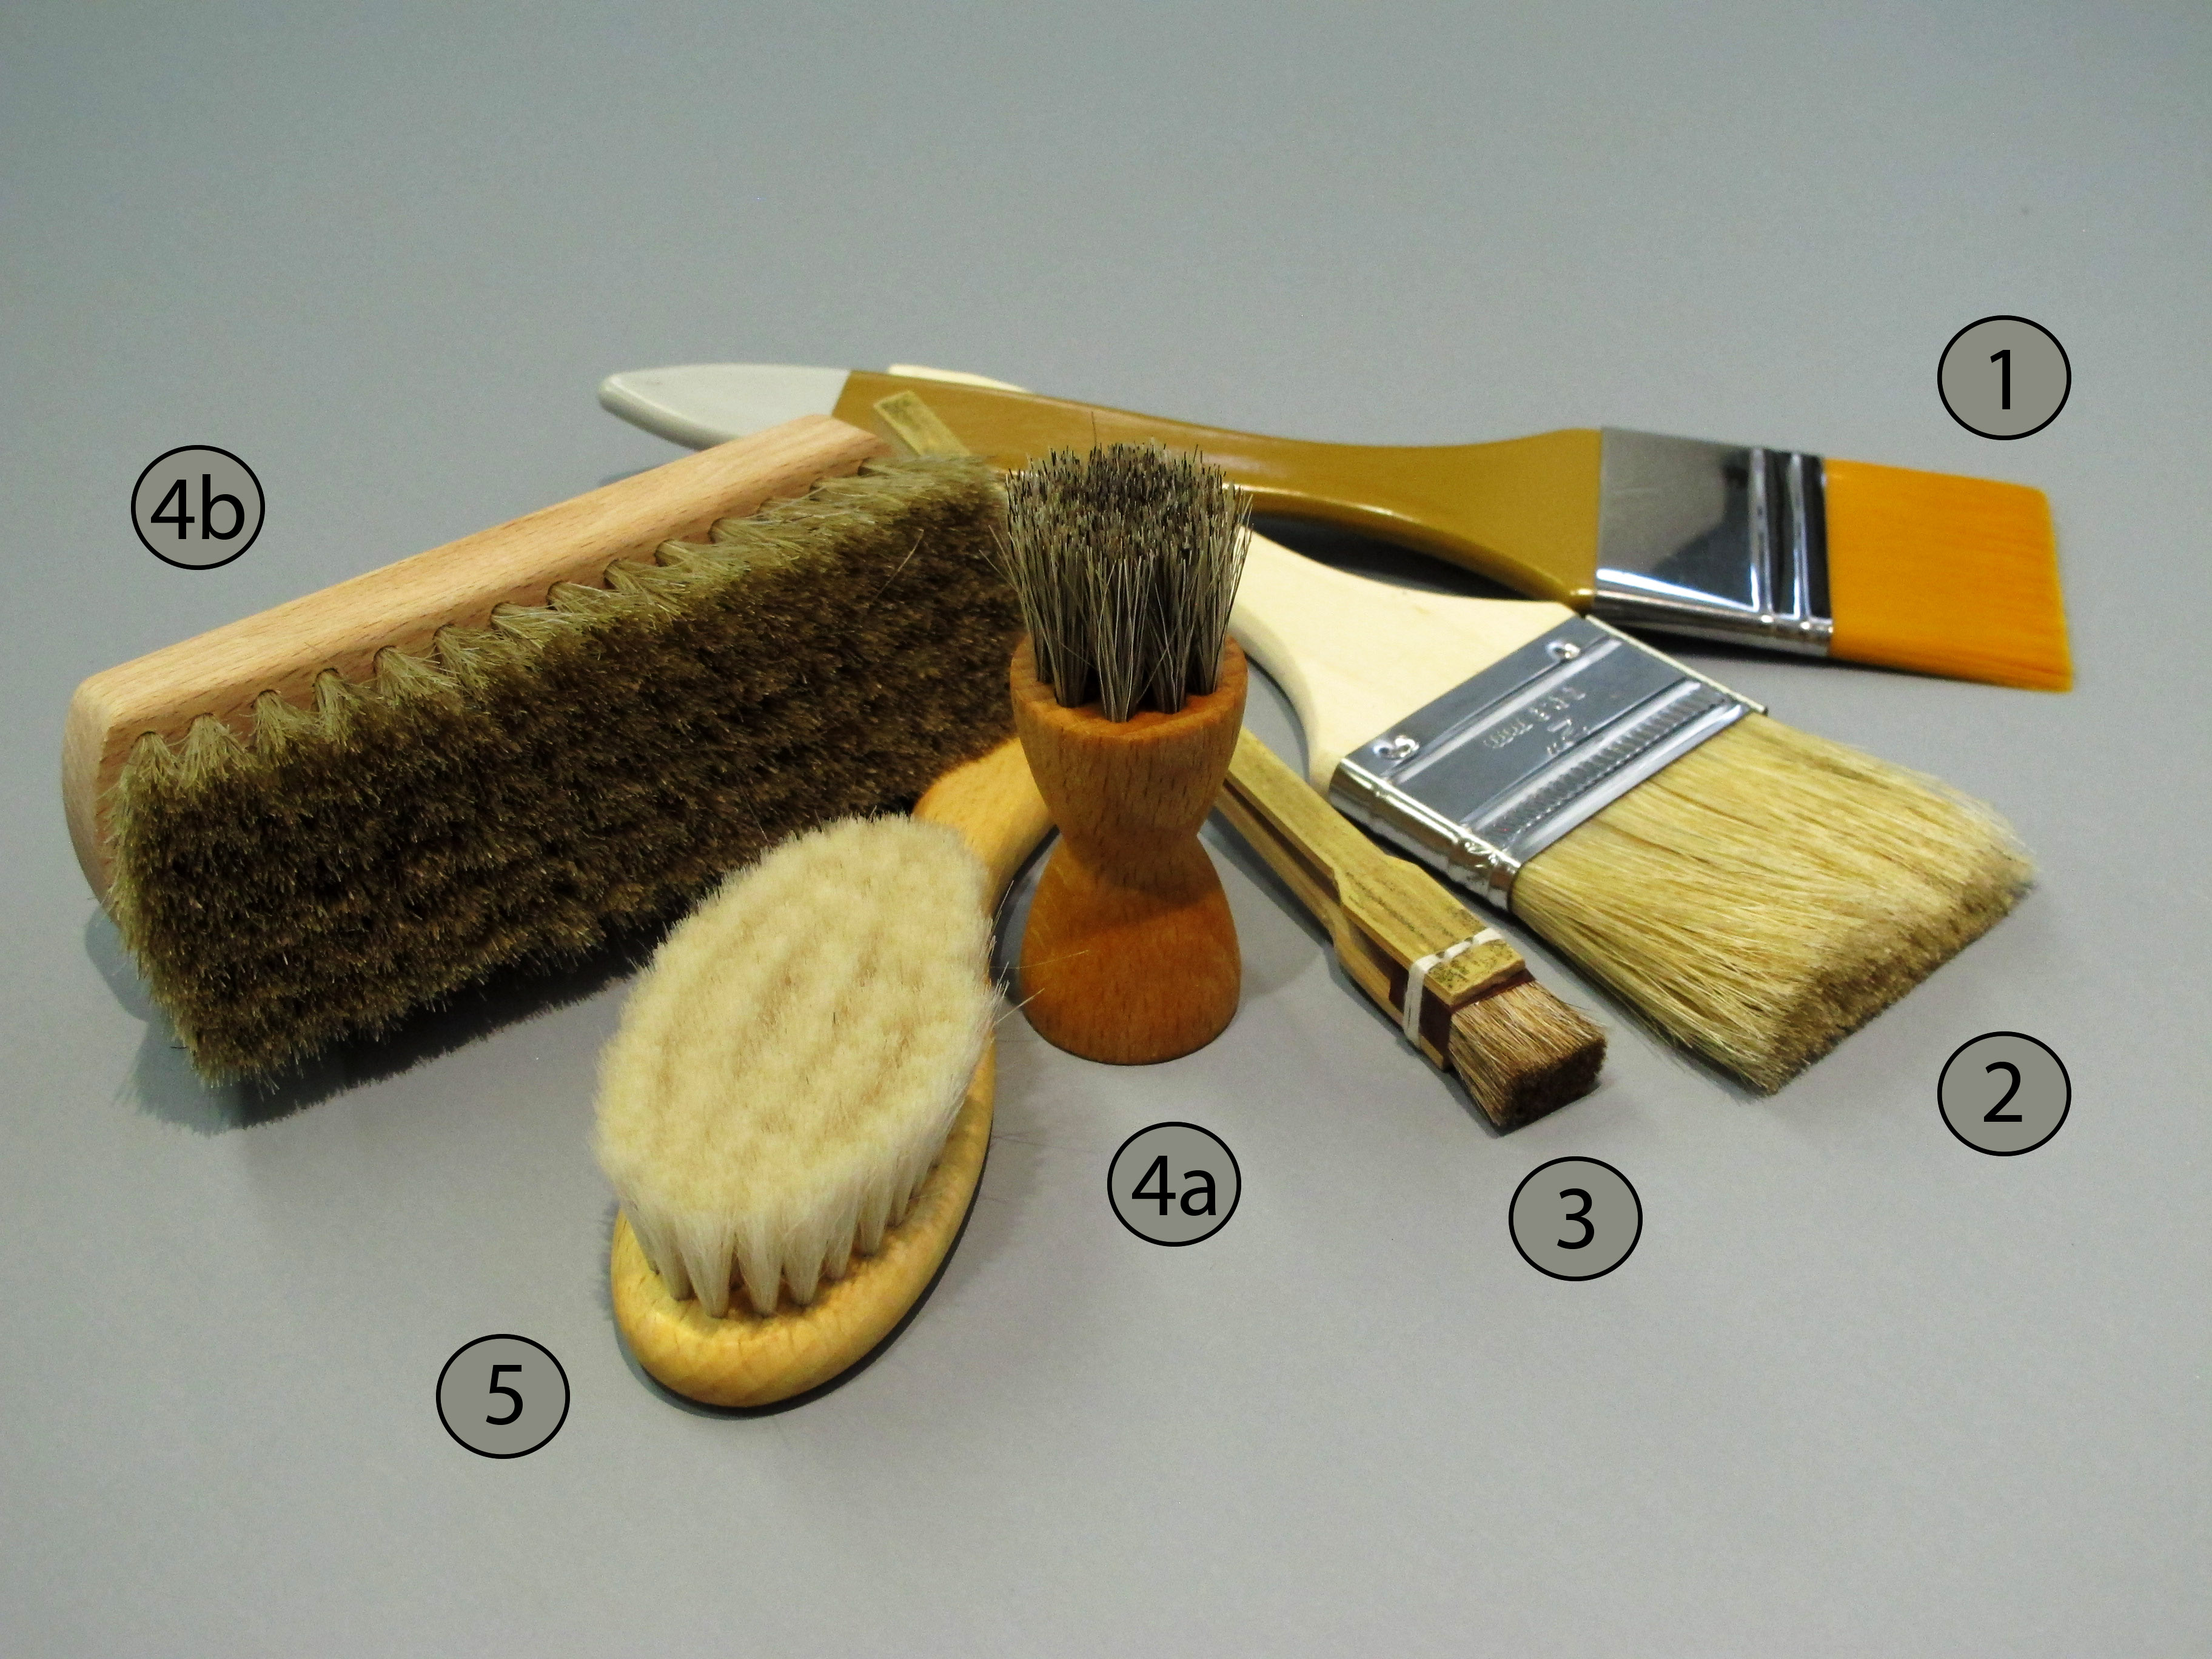
1: synthetic hair mottler
2: hog-bristle mottler
3: Japanese bamboo stippler
4: two different horse hair shoe brushes
5: goat hair baby brush
One of the most common varnishing brushes is a wide flat mottler brush. If one aims for a continuous and relatively thick layer of varnish, then that is the best choice. Water-borne varnishes such as the Polymer Varnish with UVLS can best be brushed out with soft synthetic hair mottlers (#1 in Image 3). This would also be the best brush for applying the Soft Gel Gloss isolation coat. The solvent-borne MSA Varnish is more forgiving in terms of leveling and can be applied with hog-bristle mottlers (#2).
But there are many more tools available to the varnishing artist, which can help to create subtle and individualized finishes.
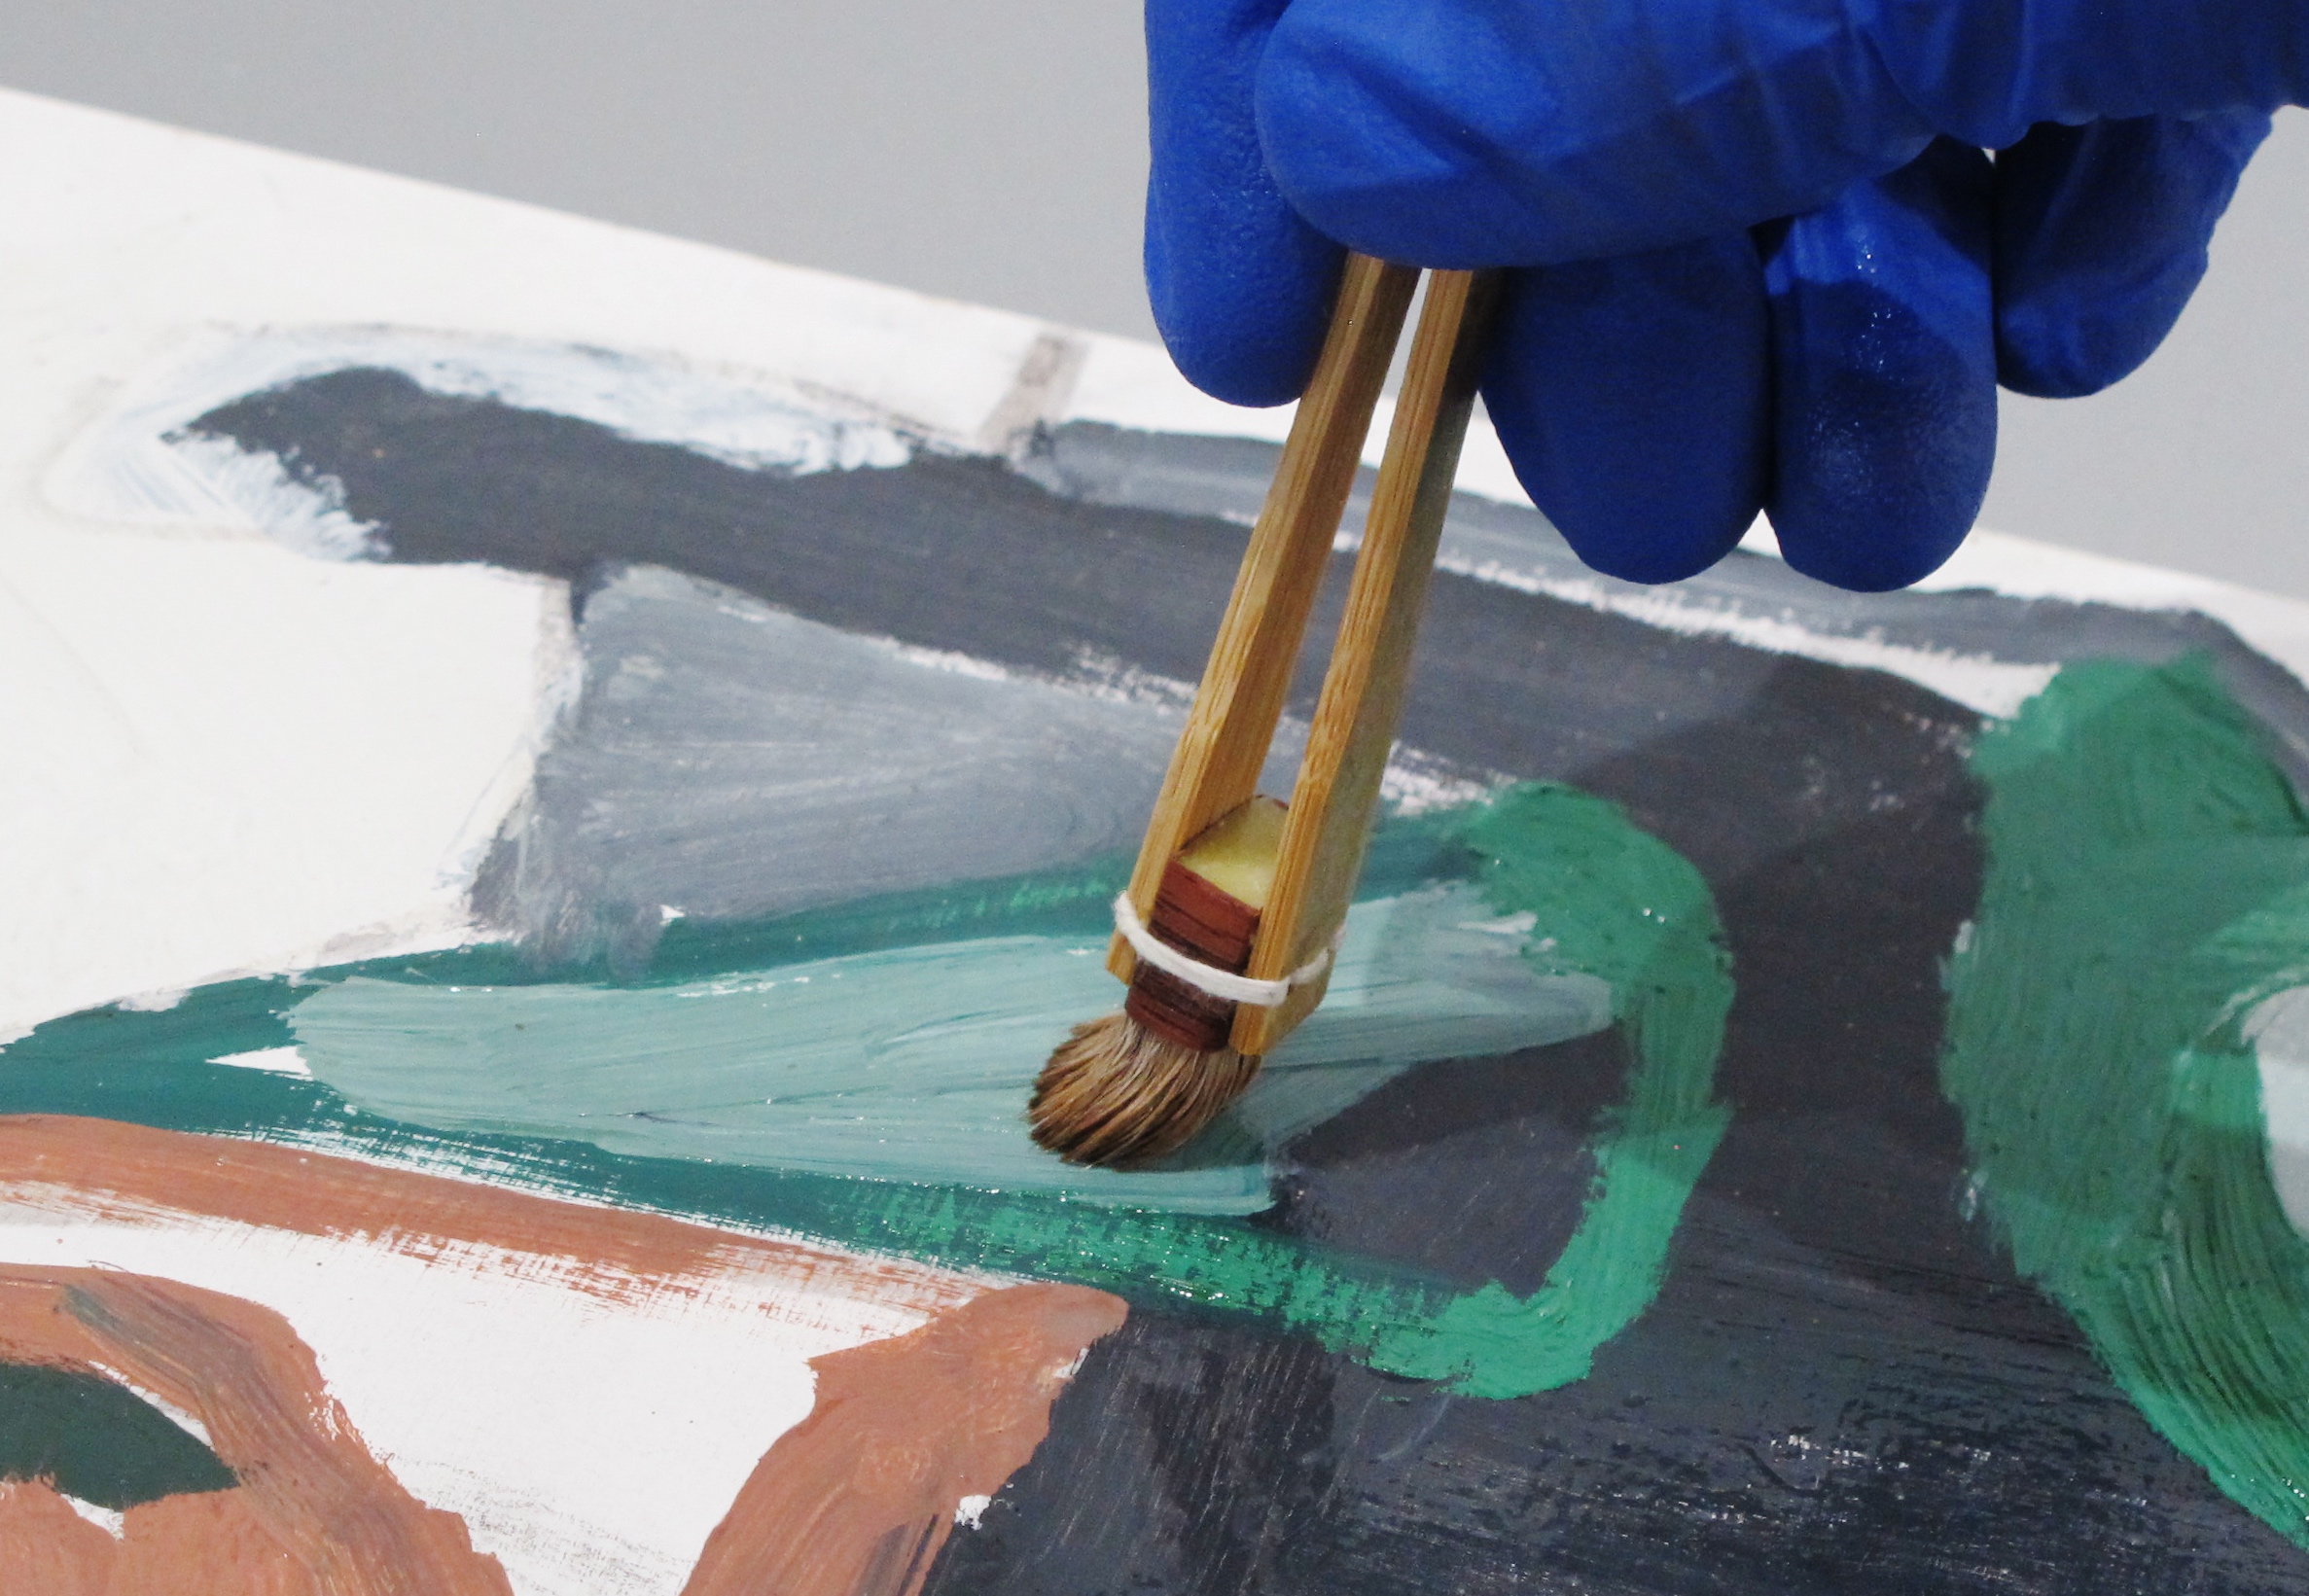
A thin varnish application can be achieved by scumbling varnish on with a short-haired soft brush, such as the Japanese bamboo stippler (#3), watercolor mop brush, or deerfoot stippler. This application technique is suitable for paintings that have some impasto. The thin varnish layer will hardly reduce the texture of brushstrokes or textures, but the colors will saturate. One can make small circular movements with the varnishing brush, or go along the direction of brushstrokes (Image 4). It makes sense to follow the forms of the composition in the painting, so that any unevenness in gloss will not be noticeable. The brush should only be loaded with very little varnish to keep the layer thin. When using a gloss varnish this thinly, the sheen will be ‘discreet’, almost semi-gloss. Since the MSA Varnish has excellent UV protection, even a thin layer of this varnish will still give considerable protection from UV-light.
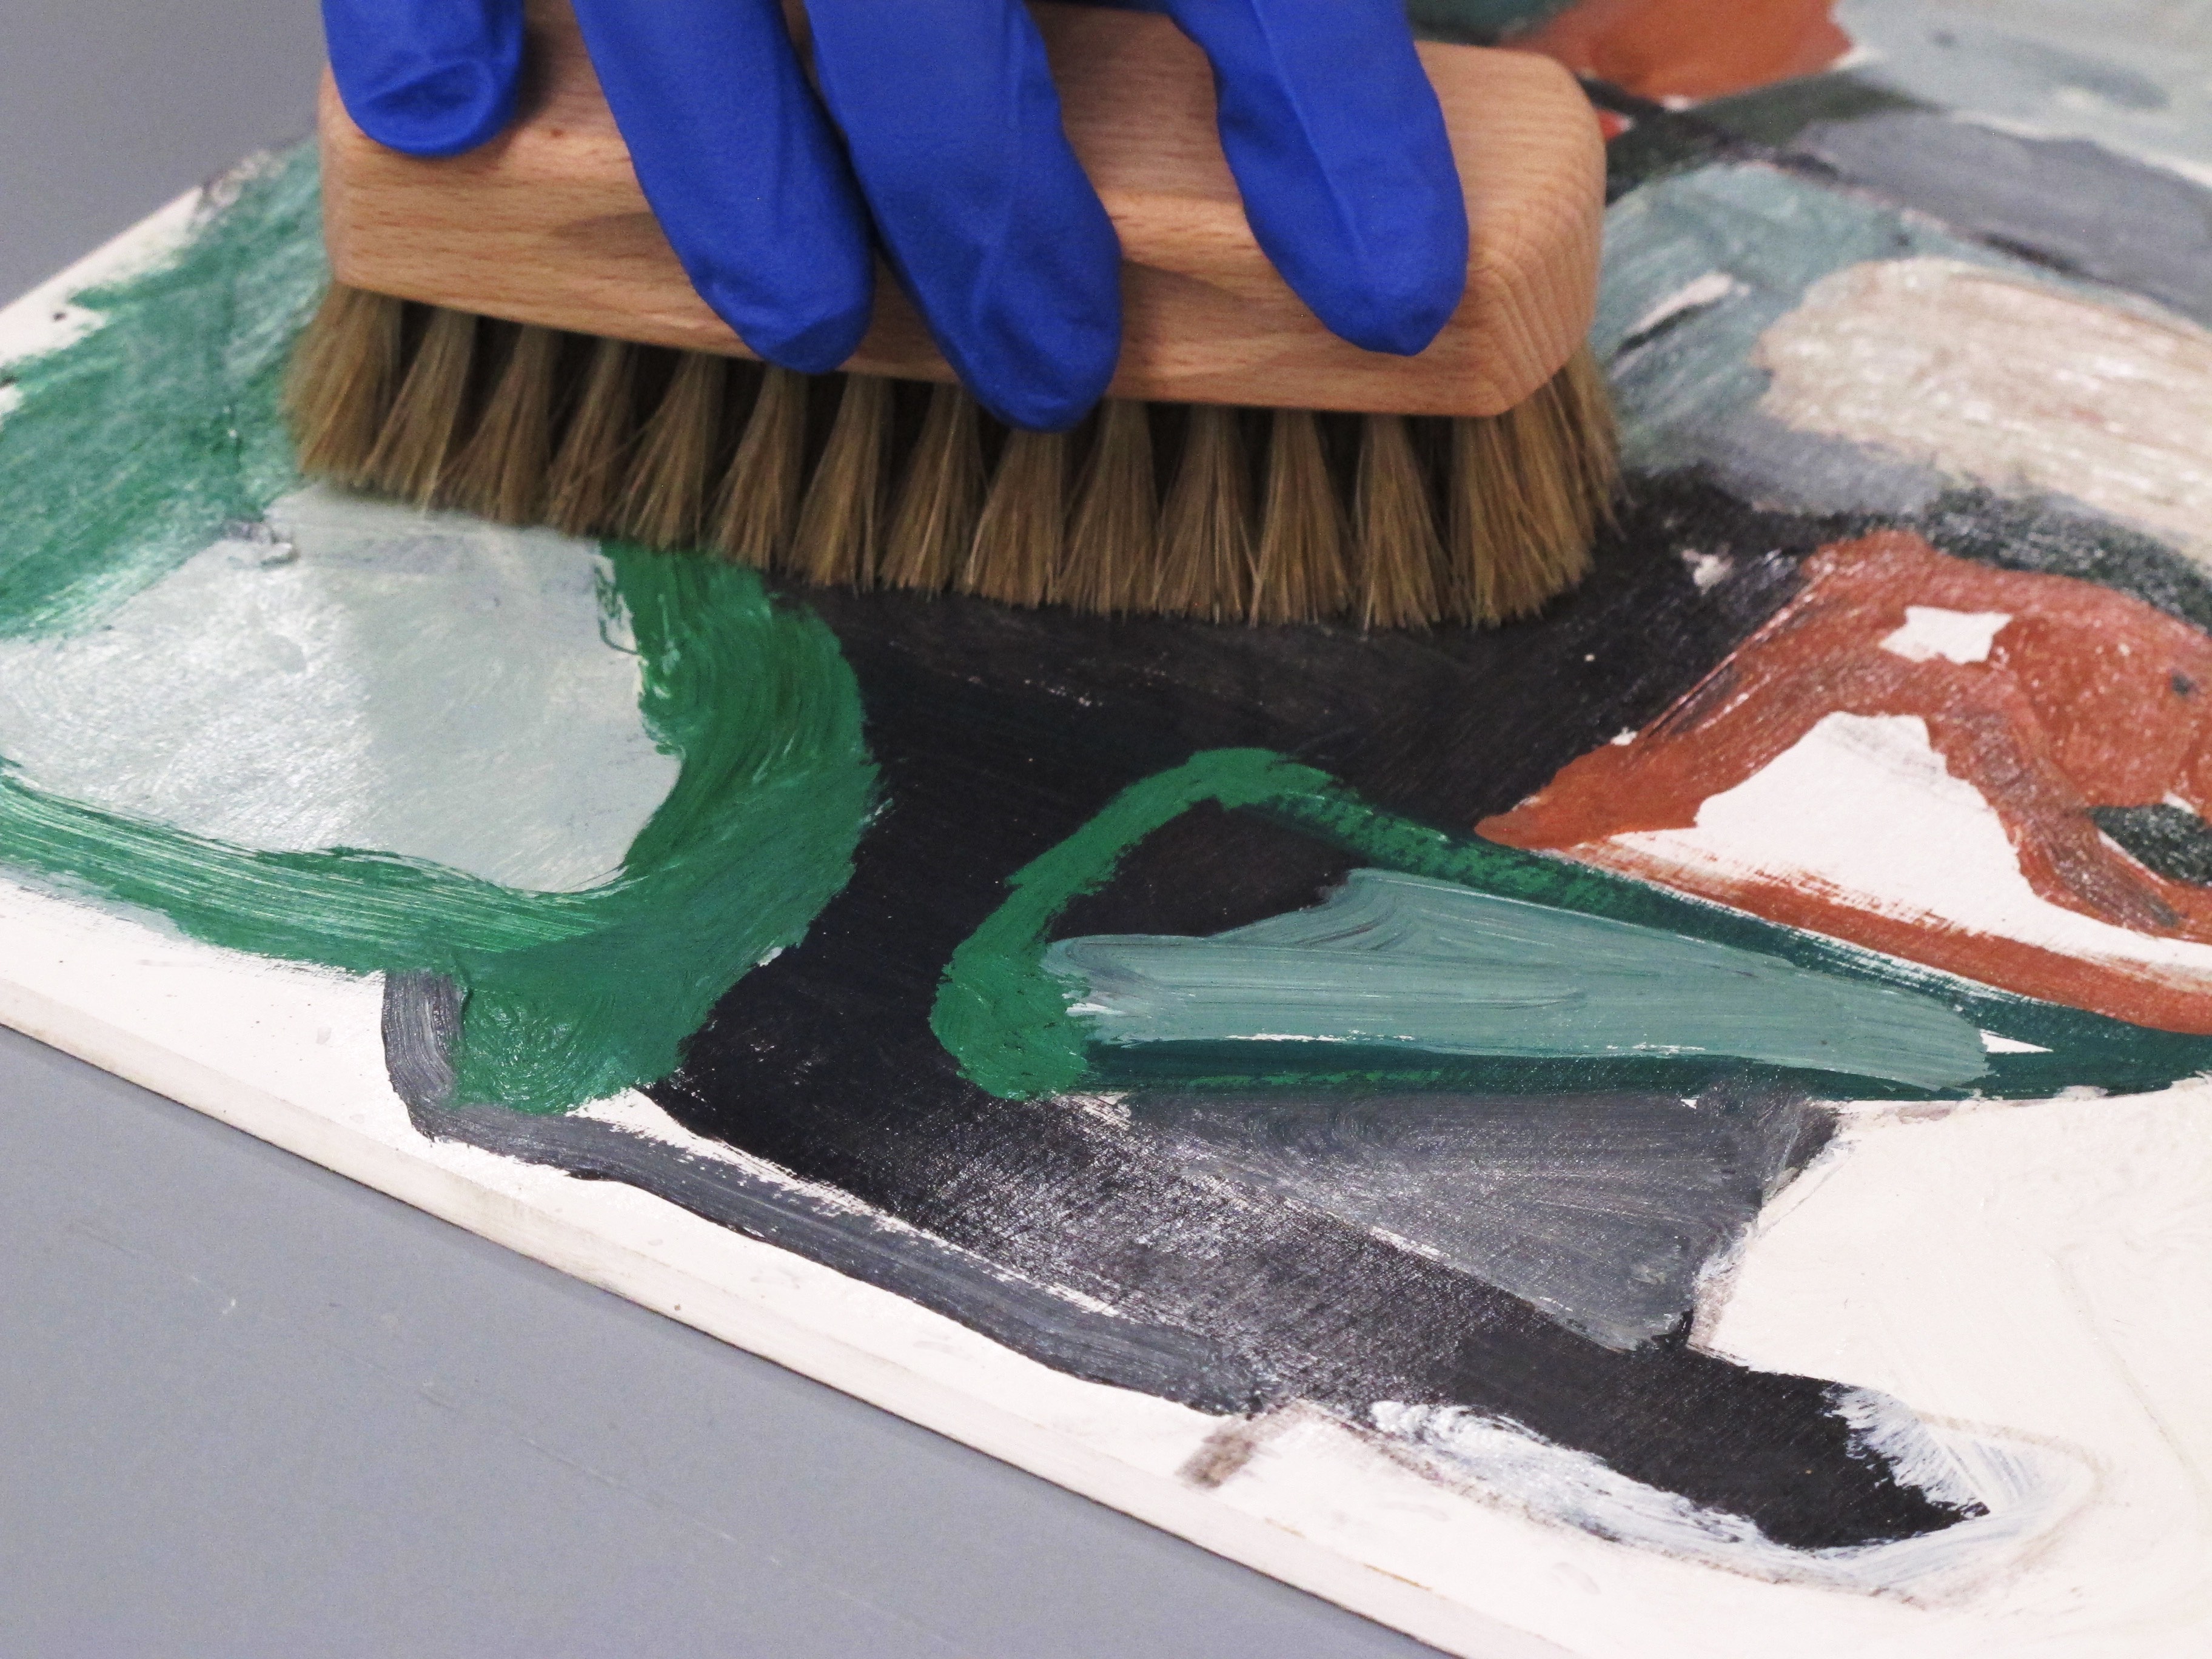
Since the MSA Varnish with UVLS has such a long open time, the still-wet varnish can be buffed up or reduced with a horsehair shoe brush (#4a /4b), a goat hair baby brush (#5), a badger blender or a lint-free cloth (Image 5). This reduces the thickness and sheen of a gloss varnish.
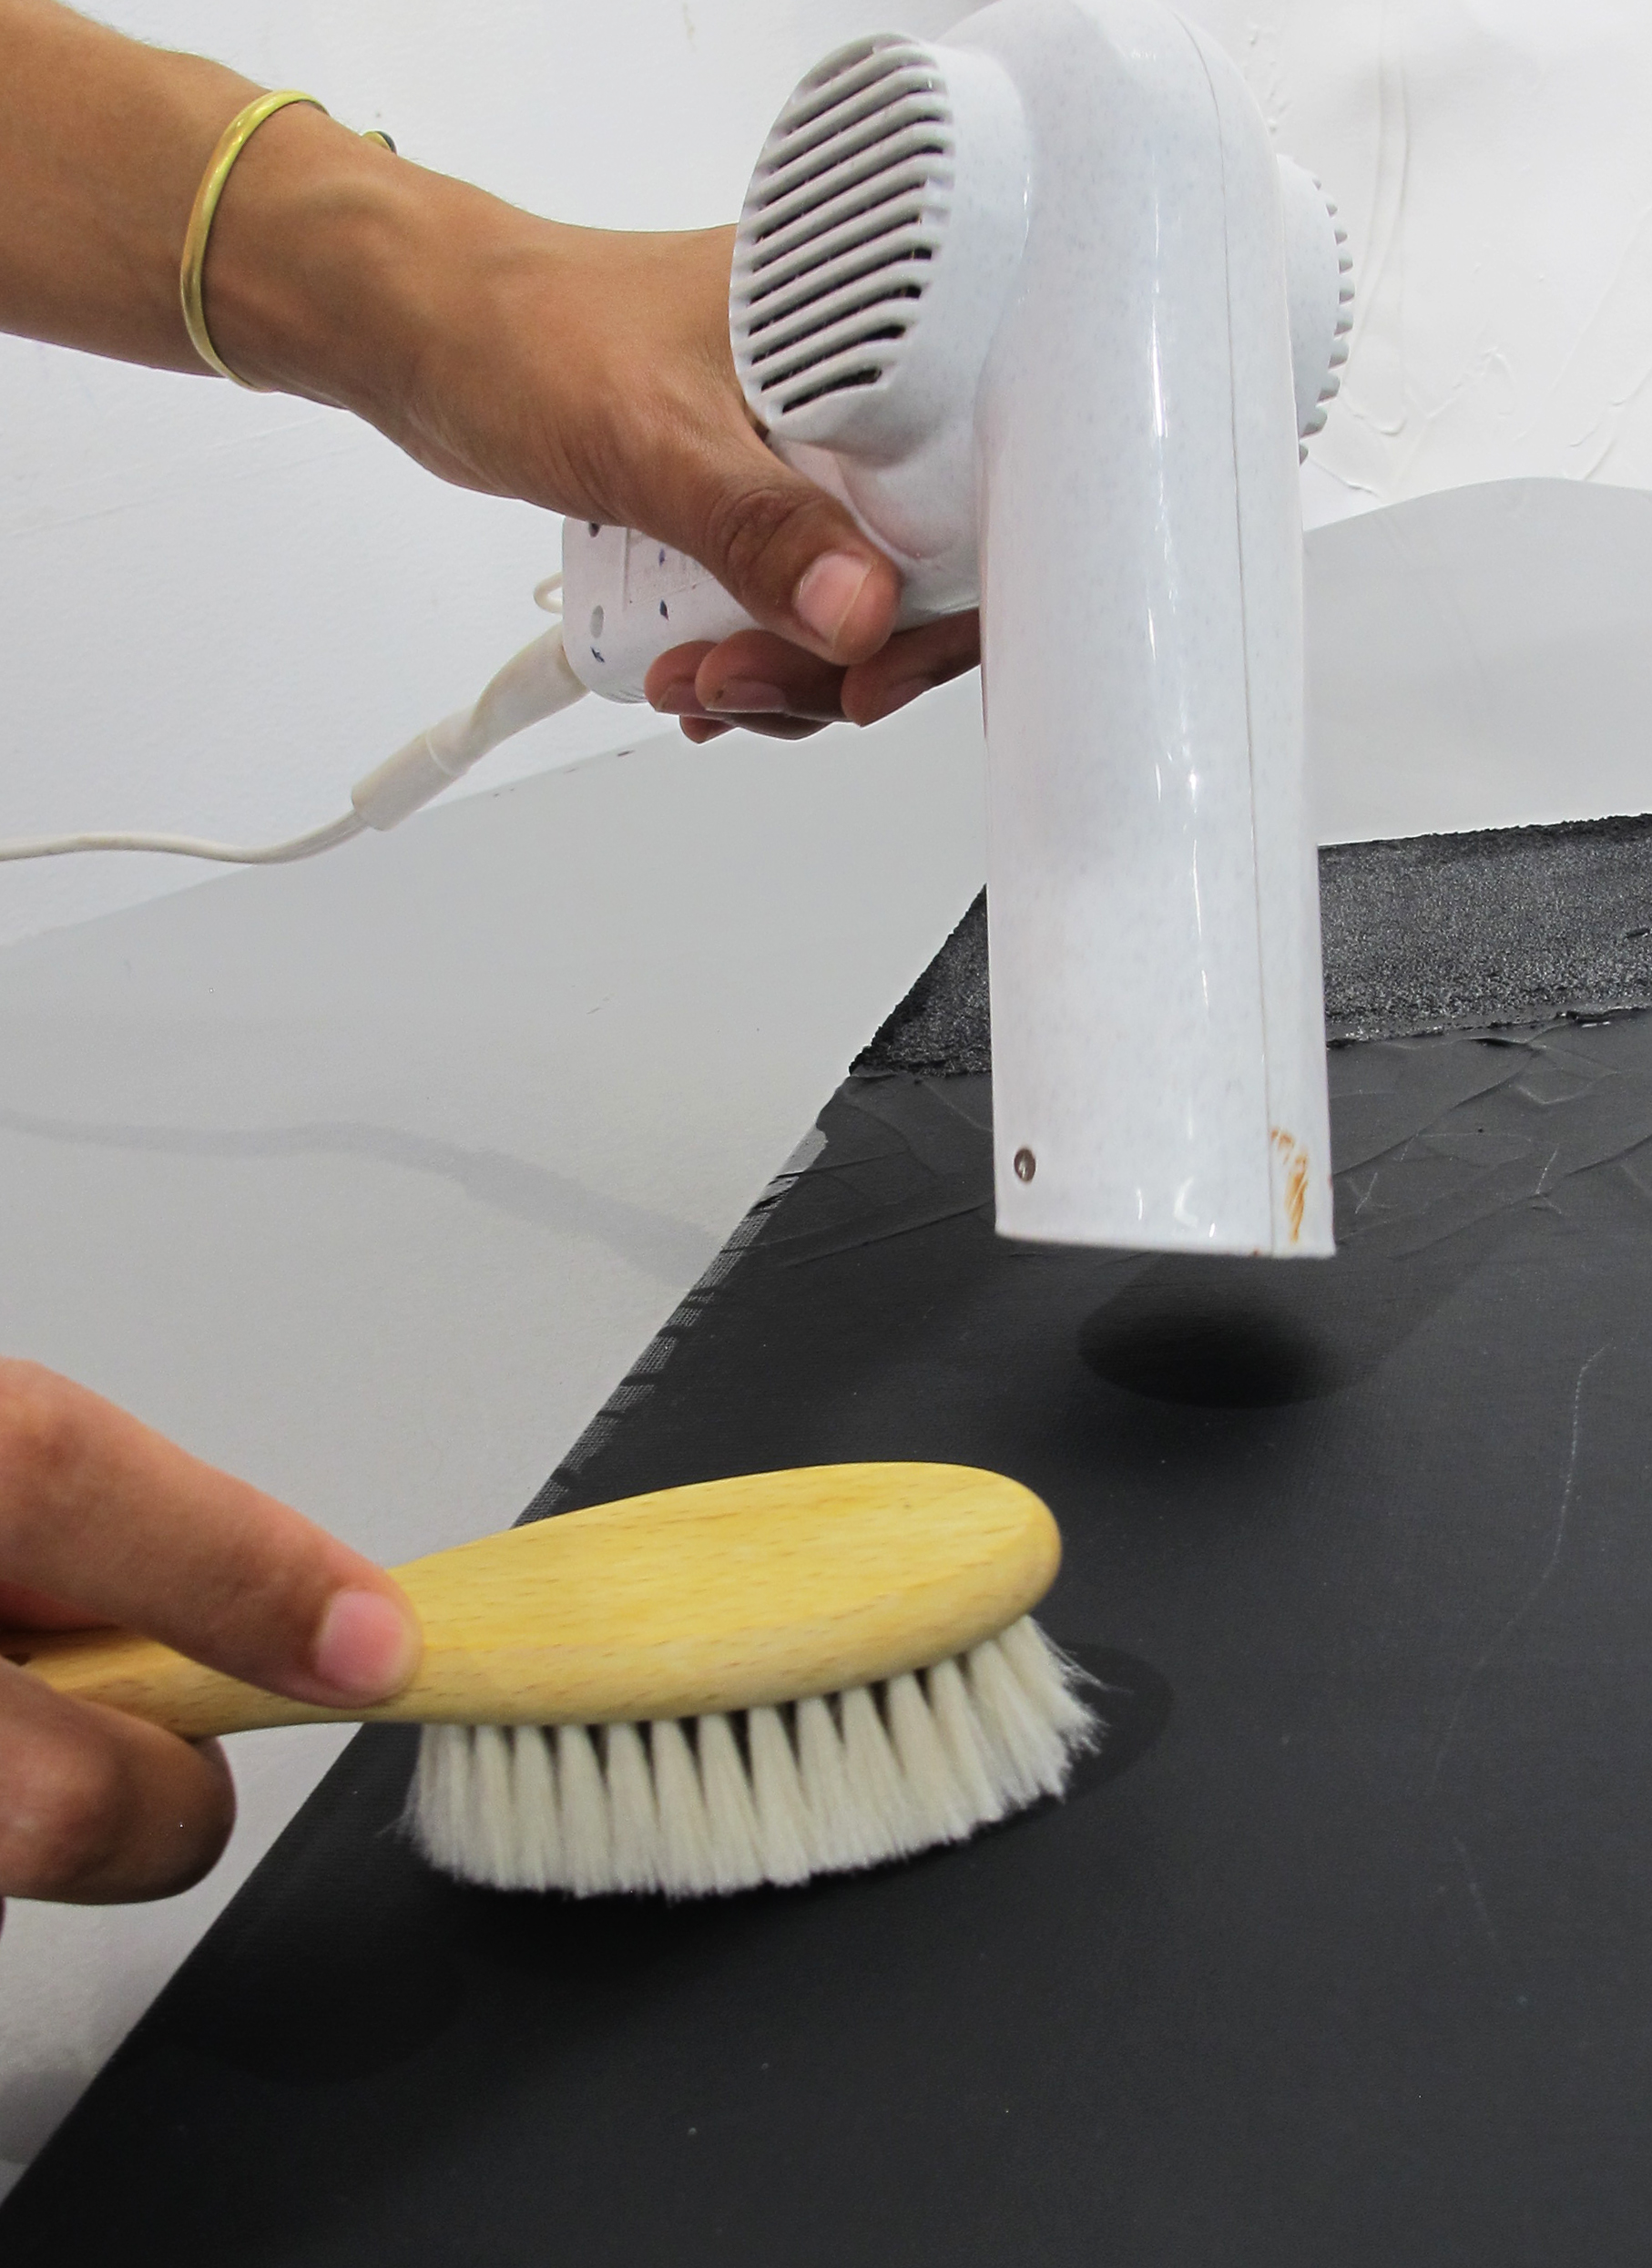
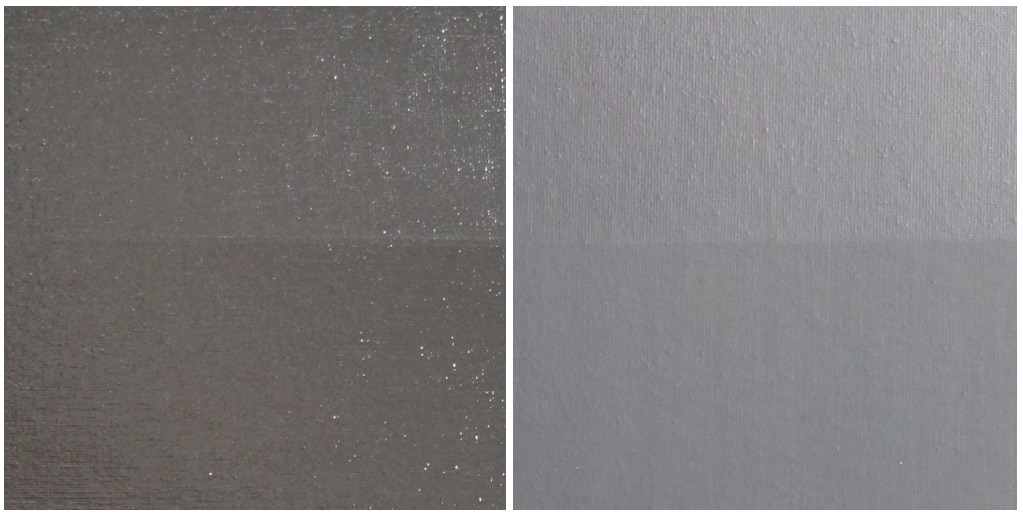
It is also possible to buff up only certain areas to achieve a slightly varied sheen. By warming the MSA Varnish with a hairdryer, and then buffing, even a dried varnish can be adjusted in sheen (Image 6). Gloss MSA can be made slightly more matte and matte or satin MSA can be polished to a slightly glossier finish (Image 7). When using shoe brushes it is advisable to get horsehair with split ends, otherwise the bristle might be too stiff and scratch the varnish too much.
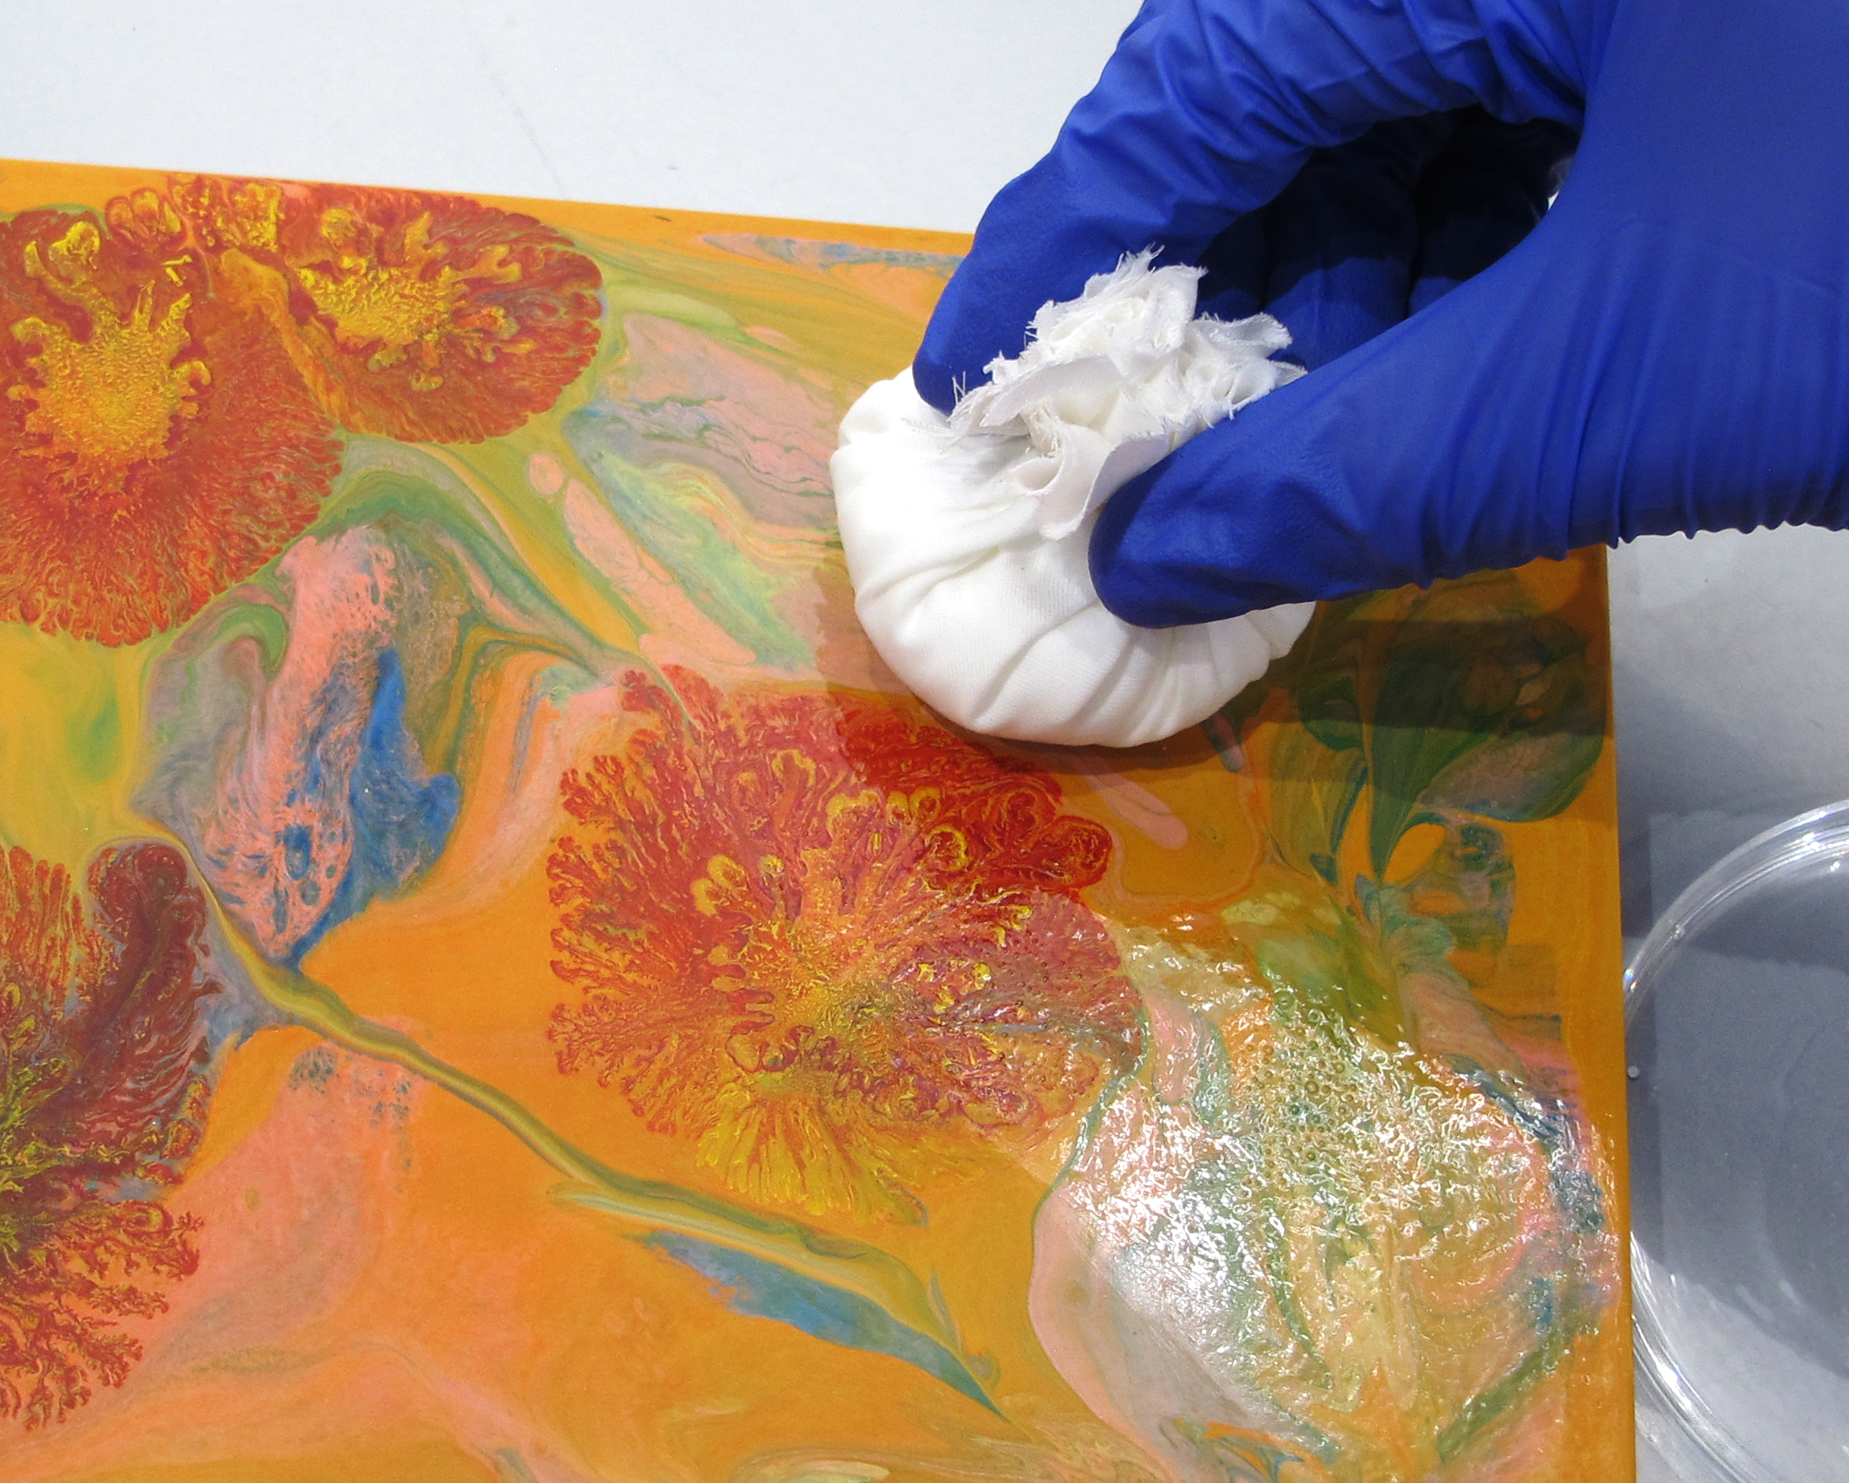
Sometimes paintings with sensitive surfaces can be varnished using a silk covered cotton ball (Image 8). Silk fibers are resistant to solvents and the fabric is very soft. The ball is dipped into varnish and then gently glided over the surface. When using white silk one can notice immediately when pigment is lifted due to the solvent in the varnish.
Large paintings can be challenging to brush varnish successfully. When the center of a piece cannot be reached comfortably, then it can only be varnished in a vertical position. It might be a good option to follow compositional forms with the brush. If that is not an option then varnishing from one end to the other while keeping a wet edge is the way to go. It can be very helpful to have a second person helping.
TIPS FOR DRYING
Drying times of varnishes vary, depending on the absorbency of paint, ground and substrate layers. Paintings on panel supports, for instance, might absorb less varnish and therefore dry more slowly. At any rate, key is to avoid any dust settling into the fresh varnish layer. Reducing airflow can help a lot.
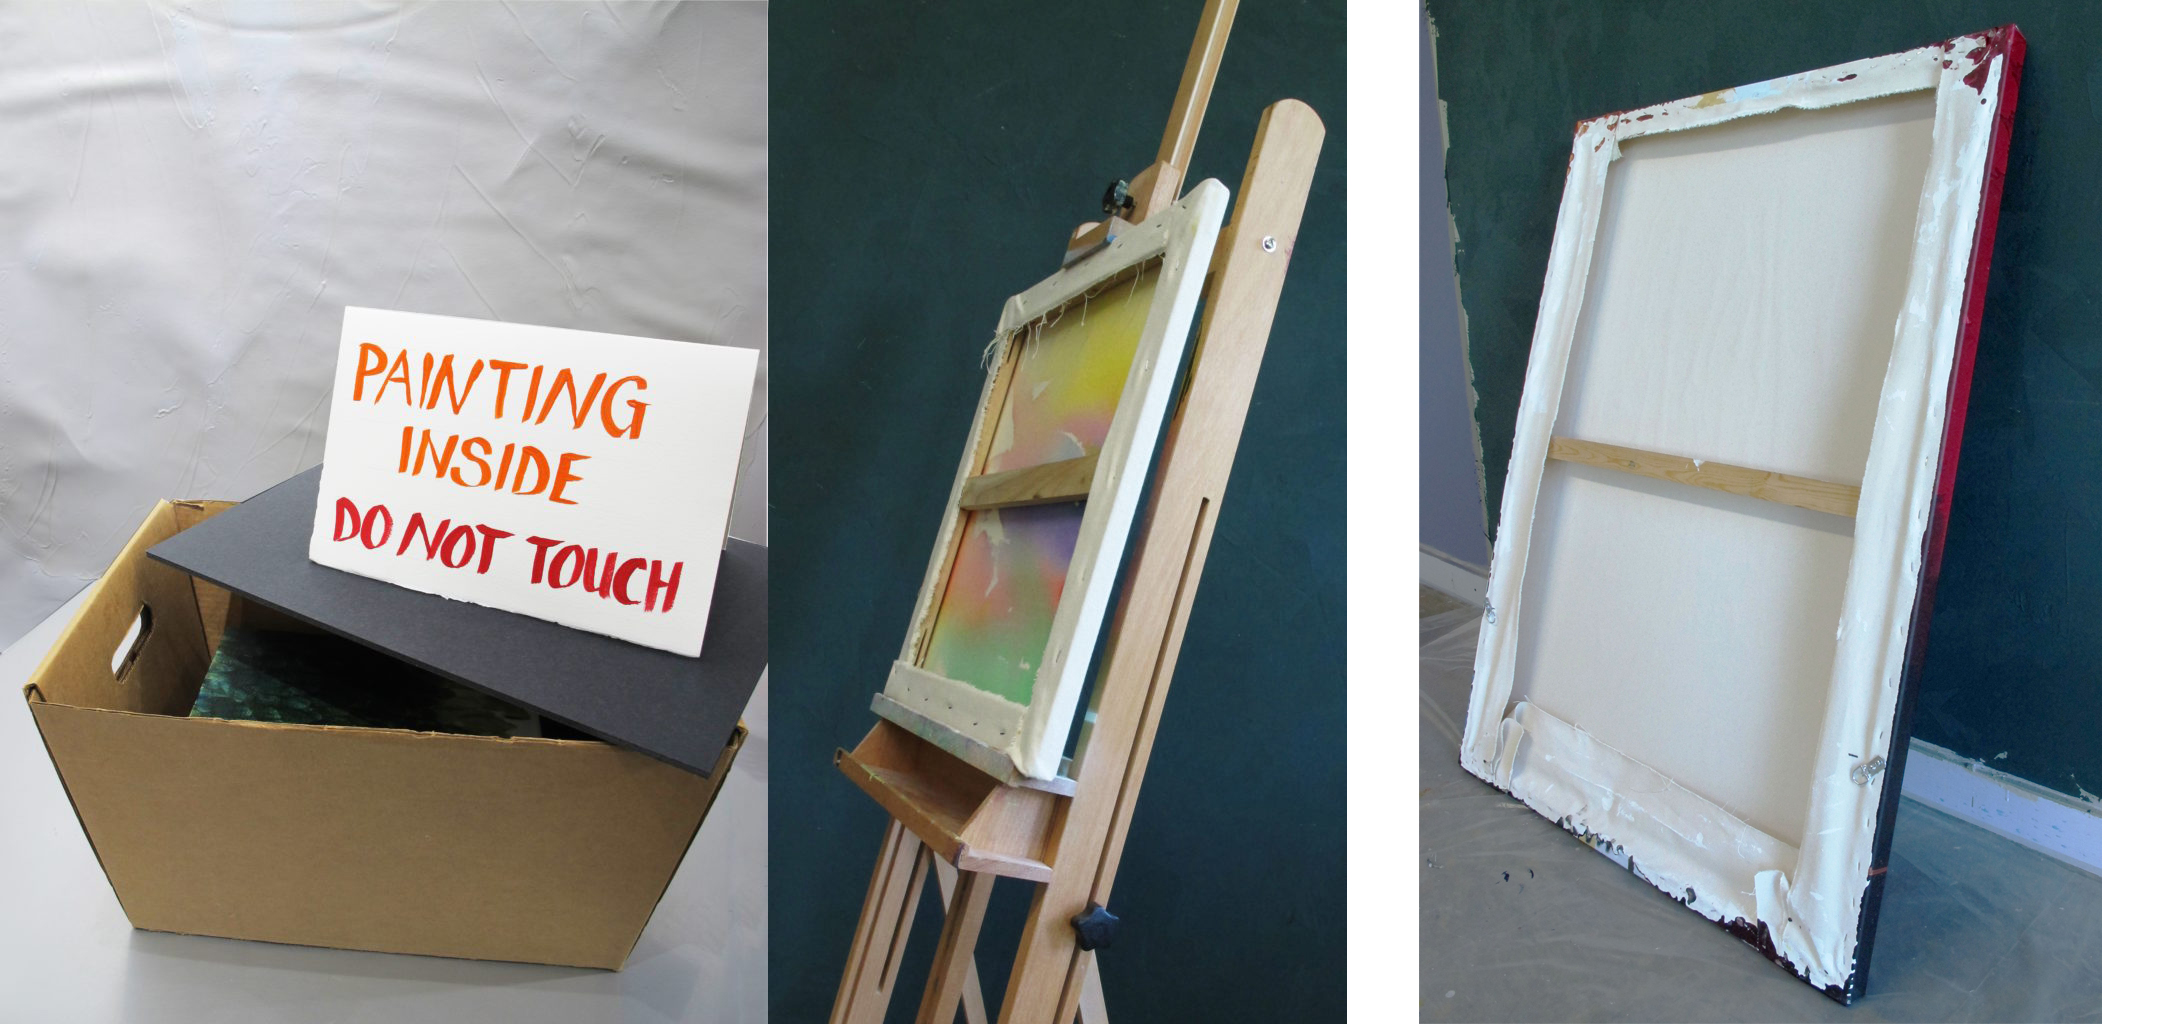
Small paintings may be placed in perforated cardboard boxes for drying (Image 9). The box should be covered with a lid to protect the painting from dust. Large paintings can be leaned against a wall as soon as a varnish has set (Image 11). The varnished side should be facing the wall, to reduce dust accumulation. Placing the painting on an oblique easel with the painting facing the easel can also be an option (Image 10).
CONCLUSION
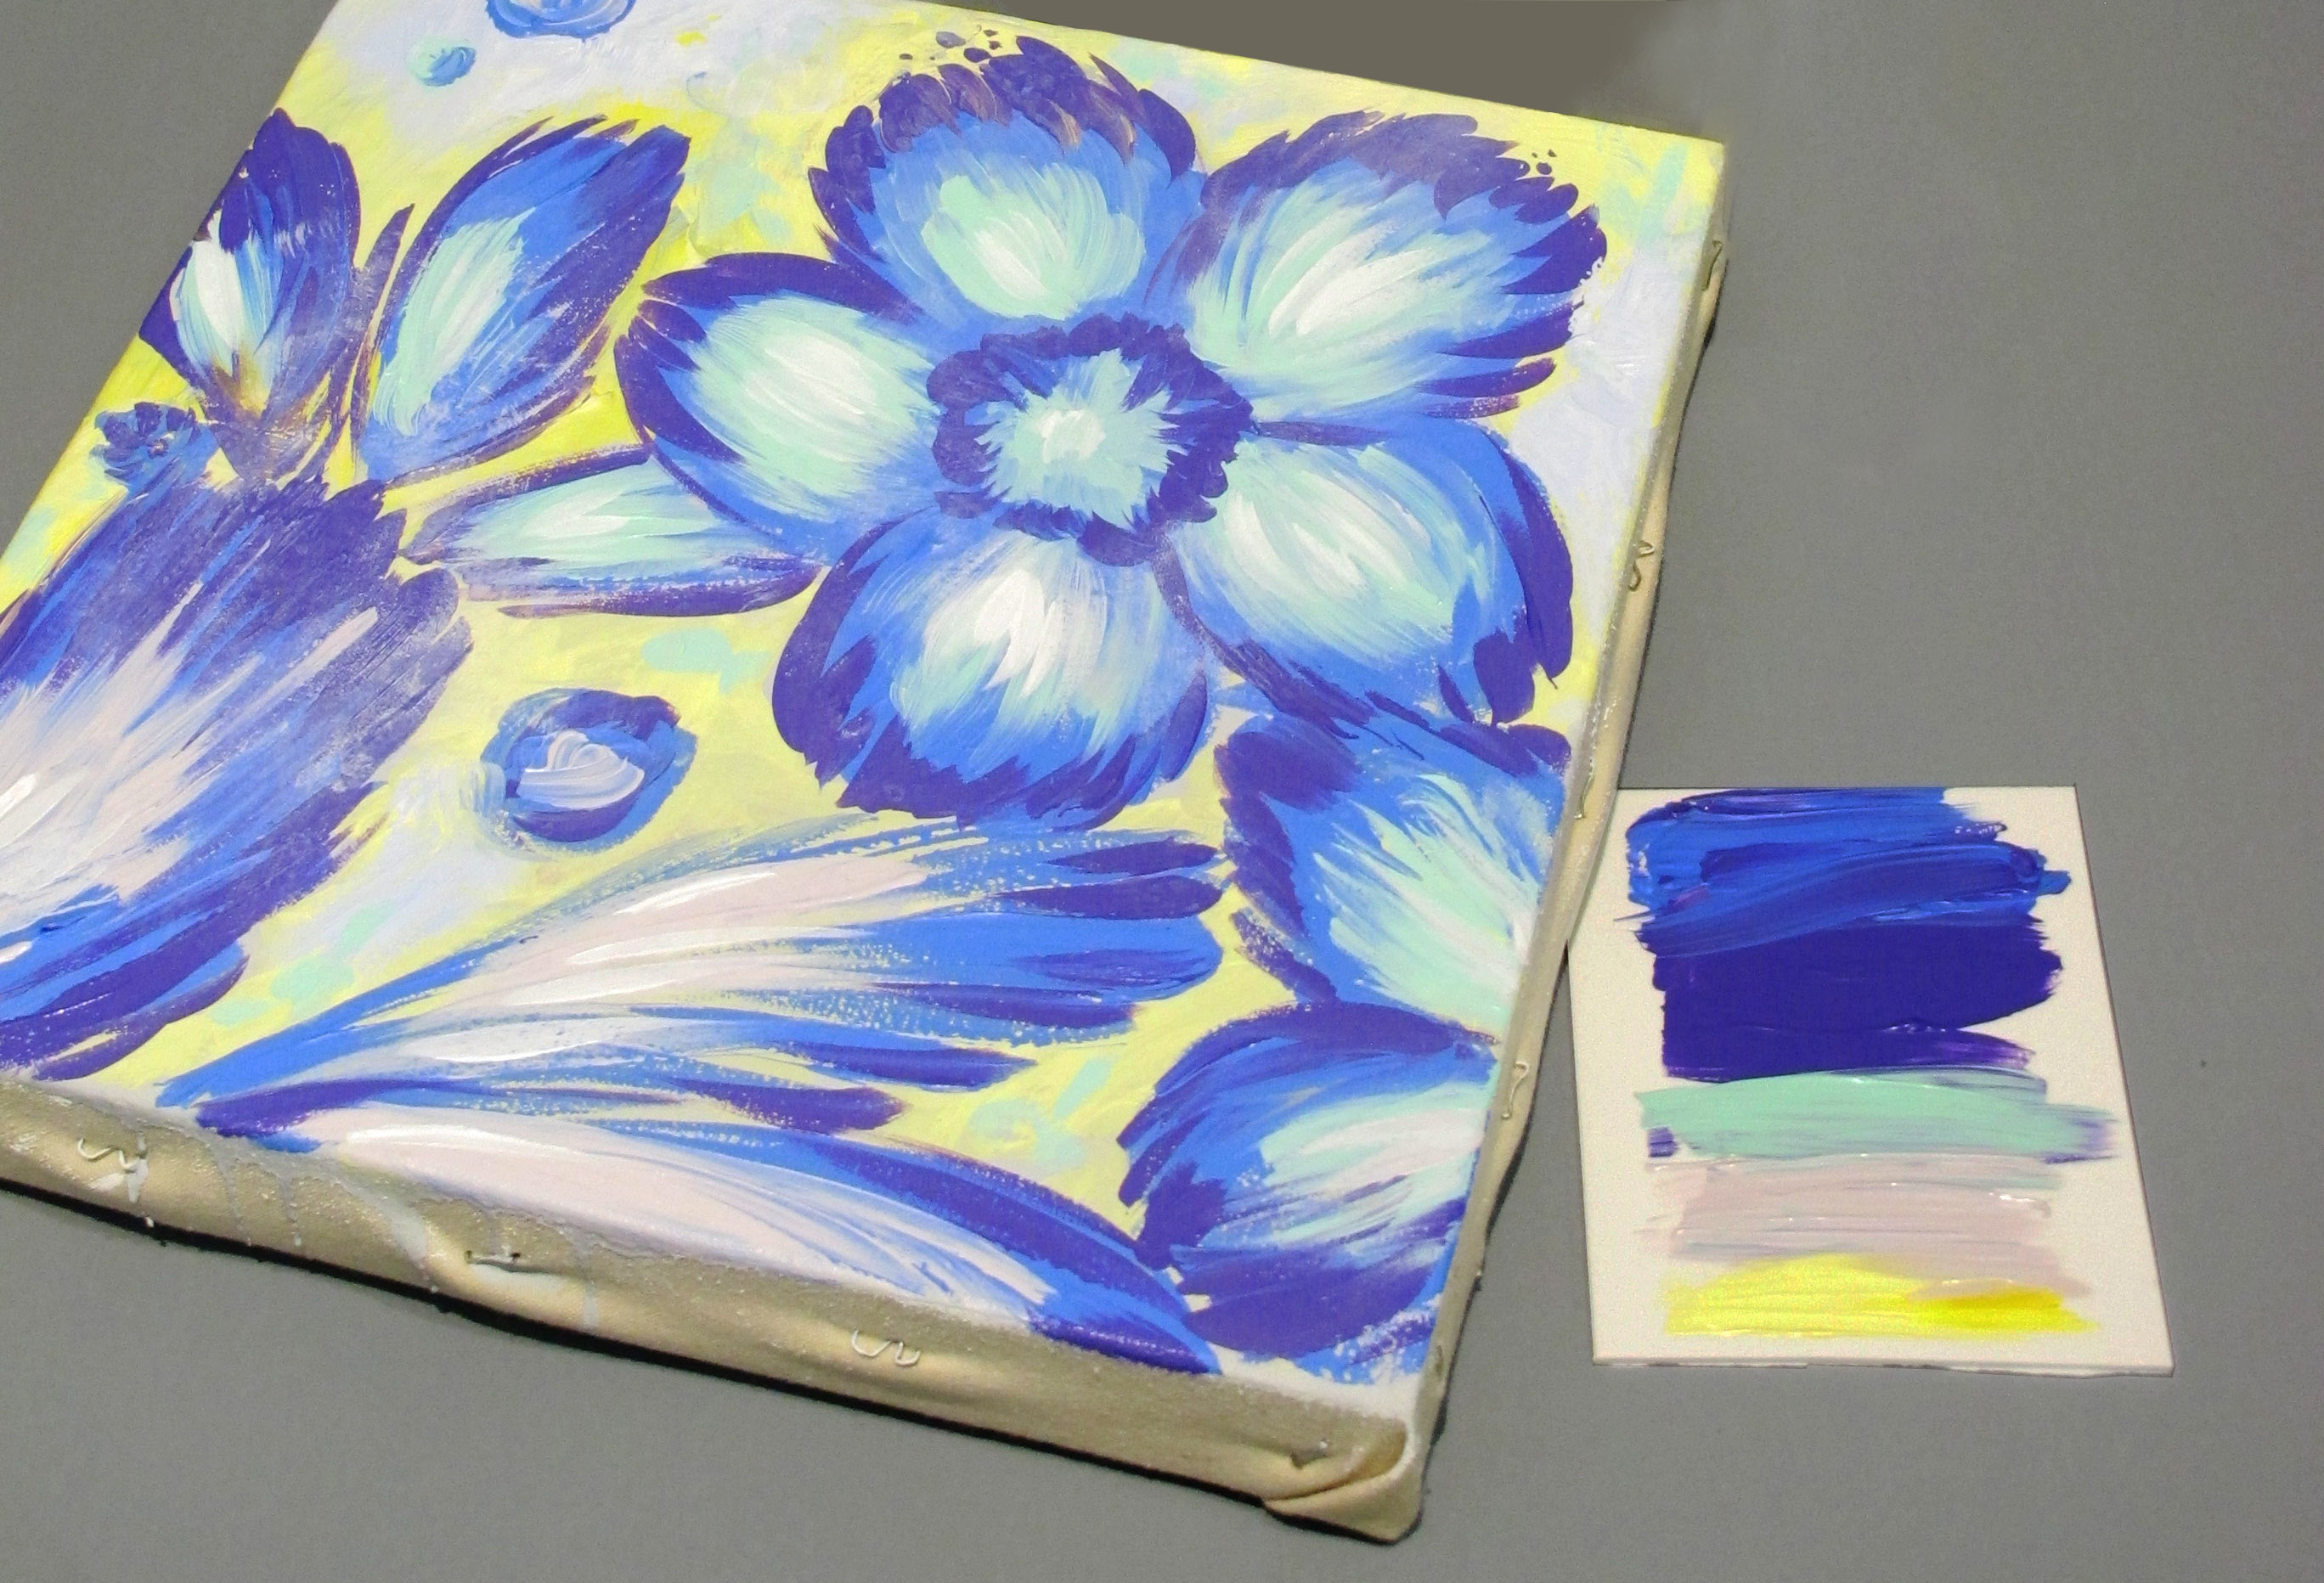
There are many ways to apply a varnish and create nuanced sheen differences. The most important thing probably is to allow enough time and to practice on a sacrificial piece. It can be very useful to create a simplified miniature, sort of a scrap piece, while painting. Such a piece can be used for solvent sensitivity testing and for varnishing tests (Image 12).
If you would like additional advice, please contact the Materials Specialists with your questions (help@goldenpaints.com).