GOLDEN VARNISH APPLICATION GUIDELINES
The following information is provided to offer insight to the varnishing process. While the virtues of varnishing are numerous and generally understood, often times the specific "how to"s" to insure successful varnish application are lacking, or simply not well understood. The goal of this guide is to supply this particular information. The application of a varnish should never be considered as merely an afterthought to the creative process. Instead, one should realize that the selection of the varnish, as well as the application of such must be carefully considered. A thorough understanding of the entire varnishing process is paramount to avoid problems.
TEST FOR YOUR APPLICATION
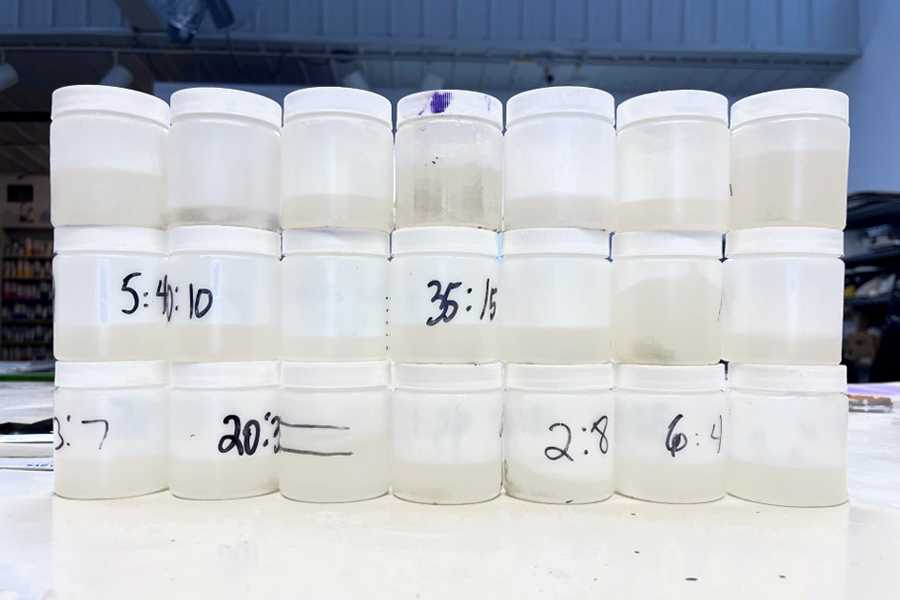
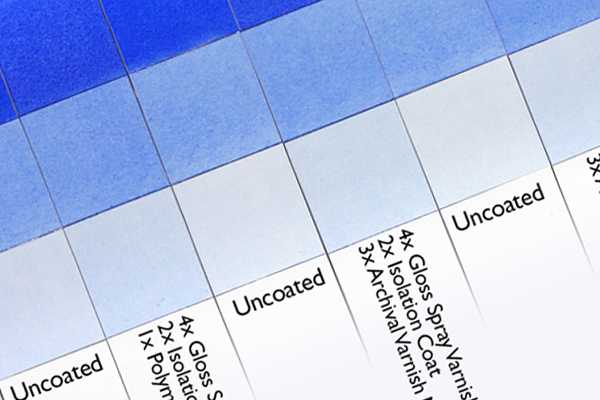
Prior to actual use, it is very important to experiment with Golden varnishes on test pieces to become aware of how they perform and how they alter the surface appearance of paintings. For best results, apply to a test piece that is similar in composition as the artwork to be varnished. This will help ensure that all variables are accounted for, and a successful varnish application will be achieved.
Isolation Coat
Only intended for acrylic paintings, do not use on oil paintings.
For future conservation and varnish removal purposes we recommend the use of an isolation coat prior to varnishing. An isolation coat is a permanent, non-removable coating that serves to physically separate the paint surface from the removable varnish. This will help protect the surface if the varnish is ever removed and make future cleaning and conservation easier to avoid working directly on top of the pigmented part of the work. Therefore, even if painted with delicate washes or large areas of colors that could potentially bleed, a clear barrier would safely cover the painted surface. It will also seal absorbent areas, which will result in a more even application of the varnish. In the event that no varnish gets applied, the isolation coat serves to decrease the water sensitivity of the paint surface, affording protection during routine cleaning/dusting.
Given the current state of conservation science, we feel the use of an isolation coat provides the most protection. However, isolation coats are also significant and permanent additions to a painting and inevitably will cause changes in the painting"s surface qualities. Whether these changes are acceptable is an aesthetic decision that each artist needs to make after sufficient testing. In addition, since it is non-removable, any mistakes or problems during this procedure cannot be easily corrected and there is always an element of risk that needs to be considered. We strongly encourage the artist to practice these procedures thoroughly so they feel confident and become familiar with any unforeseen problems. If you have any questions or concerns regarding the proper use or application of an isolation coat, please call Golden"s Technical Support Department at (800) 959-6543.
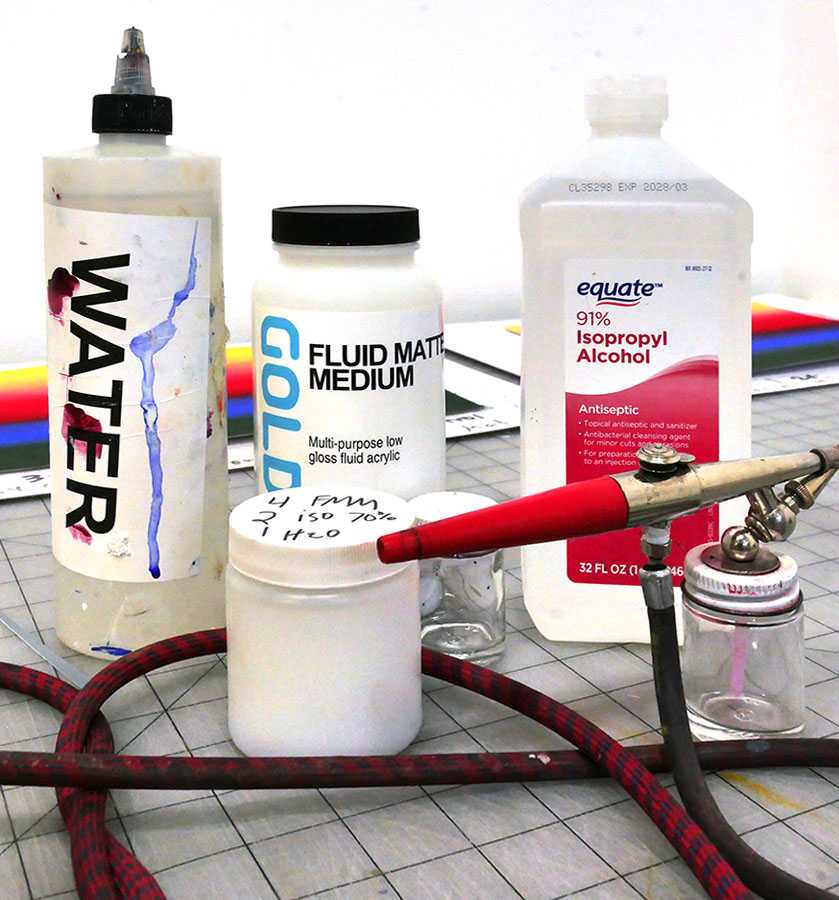
For brush application, the appropriate isolating medium can be made by diluting Golden Soft Gel Gloss with water (2 parts by volume Soft Gel Gloss to 1 part water). If a spray application is desired, a 2:1 mixture of Golden GAC-500 to Transparent Airbrush Extender can be applied with an airbrush, touch-up spray unit or commercial spray equipment. The absorbency of the surface will dictate the number of isolation layers required. For relatively non-absorbent surfaces, as is the case with a uniform paint layer, one coat brush applied or two coats spray applied are recommended. For more absorbent surfaces, which tend to be very matte, it is recommended to apply sufficient isolation coats to achieve a satin sheen on the surface. This may require two or more brush applied coats or three or more spray applications.
The isolating layer is of critical importance when applying a matte varnish over an absorbent surface to prevent a cloudy or "frosted" appearance from occurring. This frosted appearance results from the varnish and solvent being absorbed into the support, while the matting agent remains exposed on the surface. While we have carefully selected the matting agent that is in Golden varnishes to be as transparent as possible, it is still a dry particulate material. When the matting agent is deposited onto the surface, and is not a part of a continuous varnish layer, it appears as a white solid. If varnishing water-soluble paints, including watercolor, gouache and tempera, the isolation coat must be sprayed on in very light layers to avoid solubilizing the paints, which could cause loss of distinctness of the underlying image.
Surface Considerations
Make sure paints are sufficiently dry. For acrylics and other water-based media, if the painting is composed of thin layers, waiting a day or two before applying the isolation layer, followed by another two days to a week before varnishing, is recommended. If there are thick, impasto areas of acrylic paint, wait a week or two before applying the isolating layer or varnish. Oil paints generally require six months to a year drying time prior to varnish application. Next, make sure the surface the varnish is to be applied to is clean. It should be free from dust which could affect appearance of the varnish. If the isolation coat (over an acrylic painting) has cured for more than 2-3 weeks, the surface should be washed with water using a soft, clean cloth in order to remove surfactants which may have migrated to the surface, as these can interfere with adhesion. Allow the surface to dry completely before varnishing.
Another consideration is the ambient conditions of the work area. Ideally, the temperature should be above 65 F and below 75 F, while the relative humidity is between 50% and 75%. Excessive humidity or cool temperature may result in bloom, a whiteness or opacity resulting from moisture trapped between the varnish and paint layers. If the surface of the piece being varnished is warmer than the varnish applied, the varnish will become thinner in viscosity upon application. This may result in unexpected dripping or sagging, particularly if working vertically. Likewise, if the varnish and surface are relatively cool, but warm significantly shortly after application, the varnish may drip or sag. Prewarming the varnish in a warm water bath can help prevent this.
The type of surface can greatly impact how varnish is best applied. Stained or partially coated surfaces are some of the most difficult to successfully varnish, due to the uneven nature of their application. In areas with a heavier stain, the varnish may sit on top, while sections with more thinly applied paint, or no paint, will allow the canvas to absorb the varnish into the fabric support. This discontinuous surface can cause uneven saturation of the varnish, yielding a blotchy appearance with non-uniform reflectance. Also critical in the application of this sort of surface is the thinning of the varnish and the amount of varnish on the brush. More thinning and the varnish increases penetration. Too much varnish on the brush in one area and the varnish gets absorbed and soaks through the piece. An isolating layer applied before varnishing will provide a continuous surface for the subsequent application of a uniform final varnish layer. It is then possible to match the original surface appearance by lightly applying matte varnish. The nature of the surface must be considered when selecting the finish that is desired. As mentioned in the isolation section, highly absorbent surfaces must have an isolation coat applied before application of a matte or satin varnish. Surfaces that need to be reflective, such as the Iridescent and Interference Acrylics or metals, would require a gloss varnish to maintain the reflective quality. Golden varnishes are not intended for use on furniture, floors or other surfaces where a high degree of physical toughness is required. For applications such as these, the polyurethane family of resins proves most useful. When selecting a polyurethane, note that aromatic type urethanes yellow significantly, while the aliphatic types do not.
Thinning GOLDEN Varnishes
Golden Varnishes must be thinned before use. This reduces the film thickness applied and the chance of uneven application. It also allows for much greater fluidity of application, which is critical when applying a varnish. If applied in a thick state, the varnishes may show brush strokes and trap foam bubbles. The varnishes have been made thicker for the purpose of maintaining an even suspension of the solids within the varnish. Even slight settling of varnish solids during storage may result in streaking within the dried varnish film.
Thinning GOLDEN MSA Varnish
In theory, mineral spirits, commonly referred to as "paint thinner", should suffice to thin Golden MSA Varnishes, however, they do not always work. "Odorless" mineral spirits should NOT be used because they are not strong enough to be compatible with the varnishes. It is recommended that any mineral spirits be first tested for strength and compatibility with the varnish, by blending them together on a very small scale. This will minimize loss if the mineral spirits do not work. If compatible, they will thin the varnish and maintain translucency. If the solvent is not compatible, the mixture will not become thinner and may even become thicker and more opaque. To help avoid the problem of solvent incompatibility, distilled or rectified white turpentine may be used. Such a grade has been purified sufficiently for artists" use. Other grades contain residual materials that may decrease the archival nature of the artwork.
Thinning GOLDEN Polymer Varnish Distilled water is the preferred diluent for Golden Polymer Varnish. While tap water may be used, it may contain impurities such as minerals or bacteria. Some artists thin water borne materials with alcohol. This practice, while sometimes very successful, should be approached with caution. The shorter chain alcohols, like methanol, and ethanol can shock the varnish and coagulate it, making it cheesy or stringy. This practice also reintroduces a more hazardous solvent than simply water. The amount of thinning required will depend upon the method of application. For spraying, a suitable range is from 1-2 parts varnish per part diluent. For brushing, a ratio of 3 parts varnish to 1 part diluent should yield a mixture that flows on well and allows for leveling and foam release. Satin and matte varnishes tend to be thicker in the bottle than the gloss varnishes and may require additional dilution. When thinning, slowly add the diluent to the varnish while gently stirring. To ensure an even finish, the varnish must be mixed thoroughly. Be careful not to create foam bubbles. Do not shake the mixture. If mixing more than one quart of varnish, a drill with a paint mixing attachment may be used. Operate it at a low speed and be careful not to create a vortex which will pull air into the mixture. If the varnish becomes foamy, let it stand for a half hour or more to allow the foam to escape, then gently stir. When working with a Satin or Matte finish, thin down only the amount of varnish that will be used that day. Storing a diluted varnish will result in the matting agents settling to the bottom, where they may become a tightly packed layer. If this occurs, it may not be possible to fully reconstitute the mixture by stirring.
Applying GOLDEN Varnish
General Guidelines
It is preferable to brush or spray apply Golden varnishes. Other methods, such as sponging or rolling, are not recommended, as they may result in problems such as: foaming, loss of film clarity, non-uniform coverage, excessive film build, sagging, or deposition of materials from the application tool.
Brush Application
Use a high quality bristle brush, such as those made by Purdy or Wooster, or for more control and smoother application, a wide thin flat color-wash brush. The Da Vinci Cosmotop Spin brushes are an example of this type. The size of the piece to be varnished will determine the size of the varnish brush. Work from a shallow container to help control brush loading. The varnish solution should wet only the lower 25-30% of the length of the bristles. It is always best to apply the varnish on a horizontal surface in order to minimize running or sagging. If vertical application can not be avoided, as with a mural, it is extremely important that the varnish be thinly applied. In either case, it is better to apply two or three thin coats with sufficient drying time in between, rather than one thick coat of varnish. The latter will take longer to cure, staying soft for some time, and could result in drips or a cloudy film. Apply the varnish in a manner which allows it to be brushed out to the most uniform, thinnest film possible. Mentally divide the work into regions to be covered by each loading of the brush. These may be based on a systematic grid-like sequence or may follow natural boundaries of the piece. Maintain an even application by working from the center of each region outward. Lightly overlap into still wet, adjacent sections. When applying a satin or matte varnish, never apply more than two coats. If multiple coats are desired, start with the gloss varnish to build up and establish the multiple layers, then finish with one or two coats of the satin or matte finish. A thick film of these reduced sheen varnishes will result in film cloudiness, and loss of clarity.
Spray Application
The best way to achieve an even coating of varnish is to spray apply. This is particularly true for impasto surfaces. Spray application is required for any surface where the paint film is fragile, such as gouache, and should not be touched by application tools. Spraying is also a useful technique for creating a matte surface. The size of the surface to be sprayed will determine the best type of spray equipment to use. These varnishes can be sprayed from an airbrush, airless or air pressured spray equipment, or refillable aerosol equipment. In preparation for spraying, make sure all equipment is free of dirt. Work in an area free of dust and dirt and keep work off the ground when spraying. Spray three to four light even coats instead of one or two thicker applications, allowing enough time for drying between coats (1-4 hours, until surface is tack free). Release the spray trigger if the motion of the airbrush is stopped during application in order to avoid an uneven build of varnish in one spot. Maintain uniform distance from the surface, and avoid the tendency to use an arcing motion. Make straight passes across the work, changing direction once the spray has cleared the edge of the piece being varnished. Slightly overlap the spray pattern with each pass, until the entire piece has been covered. To aid in achieving a more even application, turn the painting 90 degrees in order to apply the subsequent coat perpendicular to the previous one. A typical spray application lays down a film only 1/6 to 1/4 the thickness of a brush coat application. If maximum protection is required of the varnish layer, apply multiple coats. This is especially important when protecting colorants that are not inherently lightfast, as the thicker the total varnish film, the greater the protection from ultraviolet radiation. Because it is not recommended to apply several coats of a satin or matte finish, underlying layers should be established using a gloss varnish.
Murals and Architectural Applications
Any paint or topcoat applied to a building, including interior or exterior walls, is considered an architectural coating and subject to regulations limiting the amount of VOC"s (Volatile Organic Compounds) a product may have. Murals painted directly onto these surfaces, therefore, will fall under the same guidelines and all paints, mediums, and varnishes being used will need to comply with the same rules. Containers that are 1 Liter (1. 05 Quarts) or less in size, however, are currently exempt from these requirements.
Specific Guidelines
Murals painted directly onto architectural surfaces
- Gallon sizes of our MSA Varnish, Hard MSA Varnish, and Acrylic Glazing Liquid are prohibited in the United States for architectural applications, including interior and exterior murals painted directly onto walls and ceilings.
- Quart containers of our MSA Varnish, Hard MSA Varnish, and Acrylic Glazing Liquid are allowed and can be used. The rate of coverage for these products is approximately 75-150 sq. ft. per quart, depending on the type of substrate and method of application.
- Solvents needed to thin MSA Varnish and Hard MSA Varnish might be limited or prohibited by similar VOC requirements.
- Polymer Varnish is not restricted due to VOC concerns; however, it is only recommended for interior applications.
- Always check local and state VOC regulations as these may include additional restrictions.
Murals painted onto canvas, panel, and other supports
- Currently there are no restrictions for murals completely painted and varnished on an independent support which is then mounted onto an architectural surface.
Call or email Technical Support for additional information or assistance.
Cleanup
Clean all equipment immediately following application. If tools are wet, Golden Polymer Varnish can be removed with water. Ammoniated glass cleaner or a 1:1 solution of household ammonia to water may be use if the varnish has set. Golden MSA Varnish should be cleaned from tools with the same solvent used for thinning, followed by soapy water wash and clear water rinse.
Drying Time
The isolation coat should cure for 1 day before varnishing. When building up multiple coats, allow for 3 - 6 hours in between coats. Gently inspect the surface for tack, which may signify that the coat is not sufficiently dry. Let varnish cure several days before packing or transporting art. During transportation and storage, avoid contact of the surface with packing materials, including glassine, bubble wrap or any other plastic. NEVER STACK PAINTINGS, whether varnished or not.
Care and Storage
As Golden Varnishes are removable, it is important that they not be painted over. Paint applied over the varnish would also be potentially removable, and would pose a difficult problem in conservation or restoration attempts.
Let varnish cure several days before packing or transporting art. During transportation and storage, avoid contact of the surface with packing materials, including glassine, bubble wrap or any other plastic. NEVER STACK PAINTINGS, whether varnished or not. Please refer to the following Just Paint article for more information about the handling, storage and transportation of acrylic paintings:
Safe Handling and Transportation of Acrylic Paintings
VARNISH TROUBLE-SHOOTING
If milkiness or opacity occurs in varnish layer, then
- if using a satin or matte varnish, and this only occurs over dark colors, this may simply be the nature of such a reduced sheen varnish (caused by the presence of the matting agent). There is no way of applying a satin/matte finish to a dark color without lightening it (the more matte the finish, the more potential for lightening dark areas). To restore the depth of the dark colors, apply a higher gloss to restore some of the sheen.
- if this is uniform across much of area, regardless of the darkness of the underlying colors, it may be caused by moisture entrapment. High humidity or a damp surface under the varnish layer, often causes loss of clarity. Using a warm, forced air source to blow across the surface should help the moisture evaporate, restoring clarity.
- if varnish is not properly thinned, or is shaken or stirred excessively, air bubbles may become trapped within the dry film, causing a loss of clarity. The varnish must be removed.
- if a "frosted" area appears, a satin or matte varnish may have been applied over an absorbent surface (this is common for spray applications). The varnish must be removed, the surface sealed to reduce absorbency (apply gloss varnish), followed by application of a reduced sheen varnish.
If reflectance is not uniform, then
- if surface has varying absorbency, this may result in uneven gloss. Ideally, such a surface would first have isolation coat applied to provide a more uniform surface. However if varnish has already been applied, the surface must be sealed by applying 1 or more additional coats of gloss varnish, followed by the desired sheen varnish.
- improper mix of varnish. The varnish/solvent mixture was not thoroughly mixed. If different sheens were blended together (gloss with matte), they may not have been thoroughly mixed. If the diluted varnish is used over a long period of time without restirring, it may be separating (matting agents settling). To achieve a uniform finish, start with a fresh mixture of varnish/solvent (thoroughly stirred) and apply another coat (may also consider removing the existing varnish layers).
If brush strokes remain, then
- the varnish may not have been thinned sufficiently to level during application.
- the solvent was not compatible with the varnish
- if the surface was absorbent, it may have caused the varnish to dry too quickly, and not allow it to level.
If the MSA Varnish will not thin down, then
- solvent is not strong enough to be compatible. Use a stronger solvent (distilled turpentine, toluene, etc. )
When spraying, if the surface is very pebbly or textured, then
- the varnish may have dried before reaching the surface. This could be caused by
- insufficient thinning (add more solvent), an extremely dry environment (add humidity, reduce heat, limit air flow) or by excessive air flow (reduce air pressure).
If the varnish is sinking in and not developing sufficient gloss, then
- the surface is too absorbent. Apply additional coats of isolating layers (only if no varnish is yet applied) or gloss varnish. Excessive dilution of varnish may also result in this problem.
If the varnished surface is too glossy, then
- apply a satin or matte finish of the same kind of varnish already applied.
If the varnished surface is too matte, then
- apply a gloss or satin finish of the same kind of varnish already applied.
Disclaimer
The above information is based on research and testing done by Golden Artist Colors, Inc., and is provided as a basis for understanding the potential uses of the products mentioned. Due to the numerous variables in methods, materials and conditions of producing art, Golden Artist Colors, Inc. cannot be sure the product will be right for you. Therefore, we urge product users to test each application to ensure all individual project requirements are met. While we believe the above information is accurate, WE MAKE NO EXPRESS OR IMPLIED WARRANTIES OF MERCHANTABILITY OR FITNESS FOR A PARTICULAR PURPOSE, and we shall in no event be liable for any damages (indirect, consequential, or otherwise) that may occur as a result of a product application.


