ISOLATION COATS
This Application Sheet discusses various isolation coat recipes, the #7660 GOLDEN Isolation Coat, and how best to apply them.
DEFINITION
An isolation coat is a permanent clear, non-removable coating that physically separates (isolates) the acrylic paint surface from the removable varnish. The isolation coat serves two purposes:
- Seals any absorbent areas in order to create an even surface on which to apply the varnish.
- Protects the painting if/or when the varnish is removed by separating the pigmented area of the painting from the solvents used in removal.
CONSIDERATIONS AND CAUTIONS
To Apply or Not to Apply
An isolation coat can be very beneficial to the preservation of a piece of artwork but it is not for every painting. The decision of applying an isolation coat is first an aesthetic decision: Will this serve the purpose of the work? Secondly, are the changes created by the application of an isolation coat and subsequent varnish understood and anticipated? These are important questions to consider as the isolation coat will become a permanent part of the painting. Some ways that an isolation coat may negatively affect the underlying painting are:
- Foam and bubbles resulting from mixing Soft Gel (Gloss) and water too vigorously.
- Brushstroke texture
- Change and/or loss of texture
- Change or shift of color
Testing and practice should always be done before application to insure that the isolation coat will not change or damage the piece in any way that is undesirable. Here are a couple of examples of pieces that should not receive an isolation coat:
- Oil paintings
- Any painting done with water soluble media
- A piece with intentional varying sheens and surface qualities
- Work with metallic leaf (imitation gold leaf can tarnish with exposure to gels and paints)
To Brush or Spray?
In addition to the examples above, one must consider the application of the isolation coat. Since this is a clear layer, careful consideration should be paid to the brushstrokes within the painting as to not detract from them with the brushstrokes of the isolation coat. If the piece consists of poured films then a brushed isolation coat may cause distraction and spraying or avoiding an isolation coat may be the solution. Applying an isolation coat with a brush on a painting with a considerable amount of texture can generate foam. This may warrant a spray application or the decision to avoid an isolation coat all together. In the case of paintings that involve washes or stains of color, an isolation coat may be very important as the pigments may not be contained within an adequate amount of binder and could be underbound, making these areas delicate and sometimes too fragile for a varnish removal without the possibility of paint lifting. This may also indicate that a spray application of an isolation coat may be necessary to avoid any bleeding or smearing of the paints.
SEALING THE SURFACE FOR VARNISH APPLICATION
Sealing absorbent surfaces of the painting with an isolation coat will assist in the varnish application. This will prevent the varnish from being absorbed within the surface and allow the varnish to function as an easily removable topcoat. This is especially important when using a Satin or Matte varnish because the liquid of the varnish can be absorbed into non-sealed areas leaving the matting solids exposed at the surface and creating a dusty or cloudy appearance. To determine if you have a substantial isolation coat, once the first isolation coat is dry, look at the painting at an angle and the presence of an even sheen should indicate an even surface ready for varnish.
RECIPES AND APPLICATION
It is important to use gloss products when applying an isolation coat as satin or matte products can reduce the clarity of the piece and potentially leave a cloudy or dusty look.
Brush Application
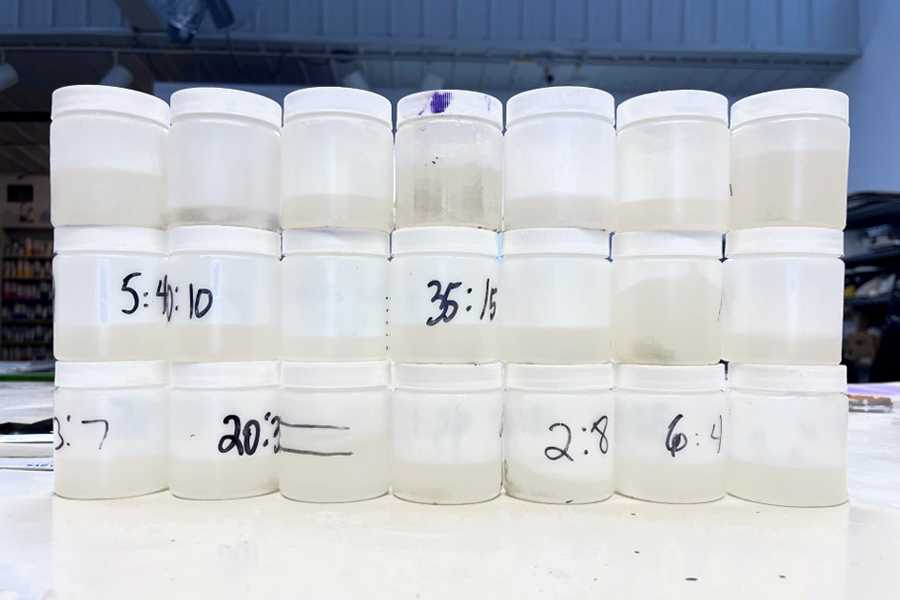
We now have a ready- to use isolation coat, that can be applied by brush as-is: https://goldenartistcolors.com/products/isolation-coat. Our previous recommendation was Soft Gel (Gloss) and water in a 2:1 mixture, which is still a good option for an isolation coat. We have found that the Soft Gel has the least tendency to foam of all the gels and when mixed in a 2:1 mixture with water, is the consistency of heavy cream, making for easy application. When combining the Soft Gel with water, mix slowly and thoroughly so no foam is generated in the mixture. Mixing this one day before application will allow any bubbles or foam to dissipate. See our video Creating a Brushable Isolation Coat for more information. Note: dilutions beyond the 2:1 mixture will increase the haziness of the dried film as the binder is further extended. If a more dilute mixture is needed, we recommend testing before application to a painting surface.
Applying the isolation coat with a soft brush that holds a good amount of material, holds its shape and leaves no brushstrokes is ideal. Thin bristled synthetic brushes often leave the least amount of brushstroke lines. One to two coats are required, although at times, more may be necessary. Any visible brushstrokes can be negated by brushing subsequent coats perpendicular to the prior coat. Utilizing the textures and borders within the painting can also assist in creating a less visible isolation coat. This means mimicking the brushstrokes of the painting or using some of the visual edges of the painting can reduce the appearance of the isolation coat brushstrokes. See our video Brush Application of an Isolation Coat for more information.
To determine if you need to apply a second or third layer of isolation coat, once the first coat is dry look at the painting at an angle for an even sheen, this should indicate adequate coverage for varnish. If the surface is not even, then another coat should be applied.
Spray Application
If you want to spray and have access to an airbrush or spray gun, use the premade Isolation Coat product either as is, or diluted with water as needed to improve flow and leveling.. Two to three coats should provide sufficient coverage although more layers may be applied if desired.
To determine if you need to apply a second or third layer of isolation coat, once the first coat is dry look at the painting at an angle and an even sheen should indicate an even surface ready for varnish. If the surface is not even then apply another coat.
DRY TIMES
An isolation coat should dry within approximately 10-30 minutes of application. It is best to allow the isolation coat to dry one day before applying a varnish. If there is a time period of two weeks or greater in between the application of the isolation coat and the varnish, it may be necessary to wipe the surface of the isolation coat down with a soft, lint free damp rag in order to remove any surfactants that could cause a lack of adhesion with the varnish layer.
Disclaimer
The above information is based on research and testing done by Golden Artist Colors, Inc., and is provided as a basis for understanding the potential uses of the products mentioned. Due to the numerous variables in methods, materials and conditions of producing art, Golden Artist Colors, Inc. cannot be sure the product will be right for you. Therefore, we urge product users to test each application to ensure all individual project requirements are met. While we believe the above information is accurate, WE MAKE NO EXPRESS OR IMPLIED WARRANTIES OF MERCHANTABILITY OR FITNESS FOR A PARTICULAR PURPOSE, and we shall in no event be liable for any damages (indirect, consequential, or otherwise) that may occur as a result of a product application.


