
PanPastel is popular for many drawing & sketching techniques.
Subtractive
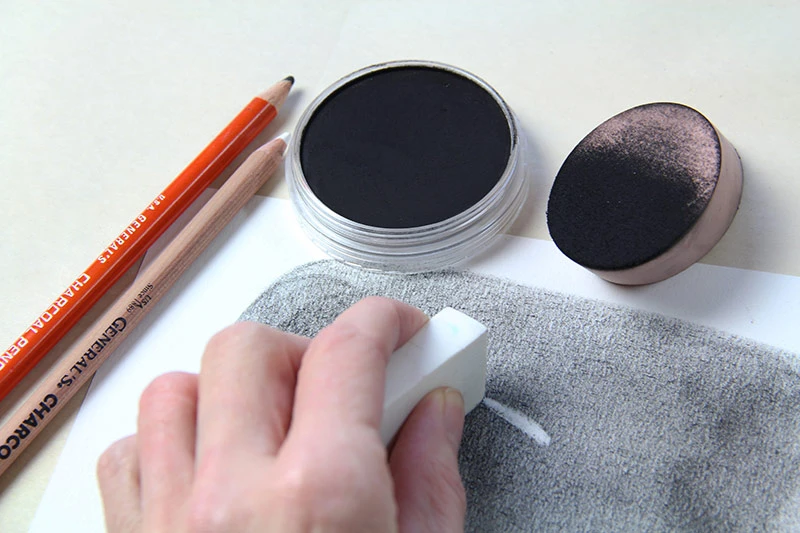
Tone paper using PanPastel and one of the larger Sofft® Sponges (Angle Slice or Big Oval). Then use an eraser for subtractive drawing techniques.
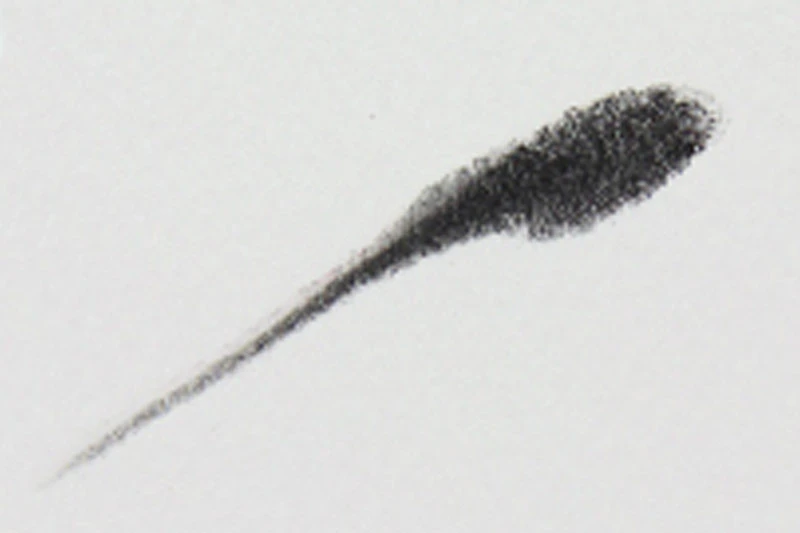
Line Weights
Change line weight by varying pressure on Sofft Tools. Also manipulate sponges and use edges for different size marks.
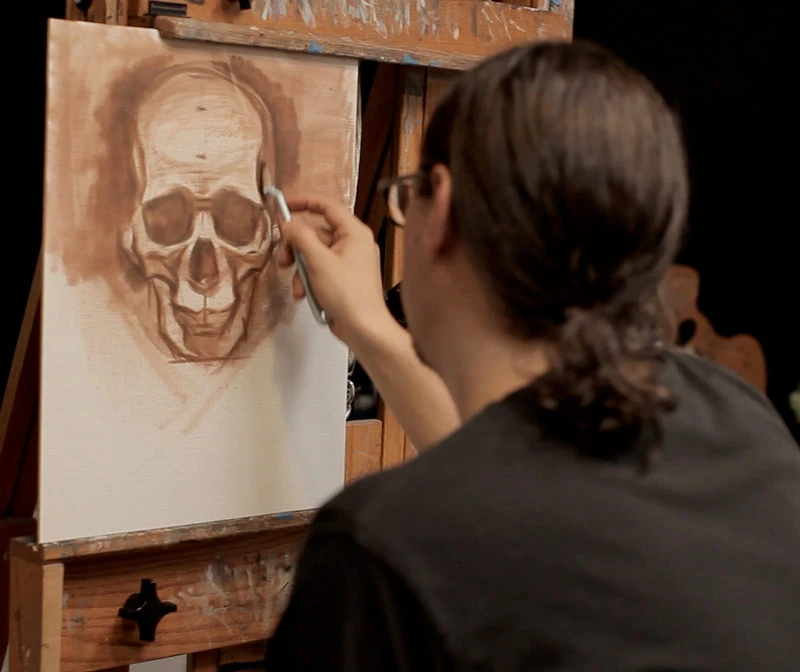
Sketching
PanPastel is a great way to block-in for underpaintings, for drawings and quick sketches for color studies.
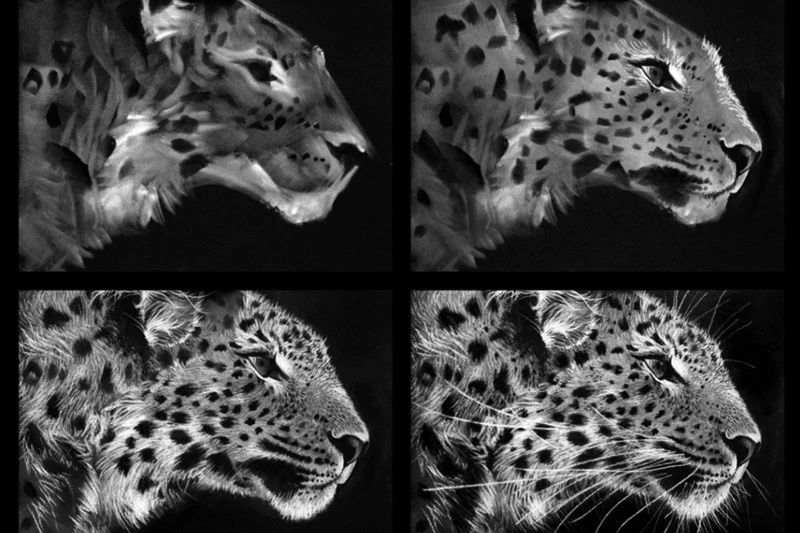
Sharlena Wood - "Drawing Wild Animals" Craftsy Class
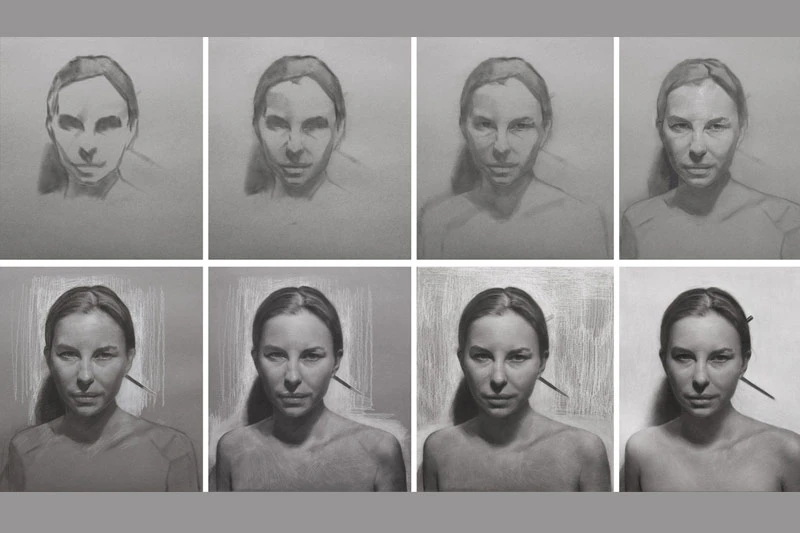
David Kassan “Aubrey”
PanPastel Black & Sofft Knife No.4 with General Pencil White Charcoal Pencil
"Drawing Closer to Life" Video Series
Alla Prima
“I also use different PanPastel Colors for my initial block-ins for my Premier Coup (Alla Prima) oil painting studies, because they offer the artist a multiple of color dry set-ups in which you can really build up beautifully rich texture and pure color oil paint strokes. No more melting into an underpainting’s wash.“ - DAVID KASSAN
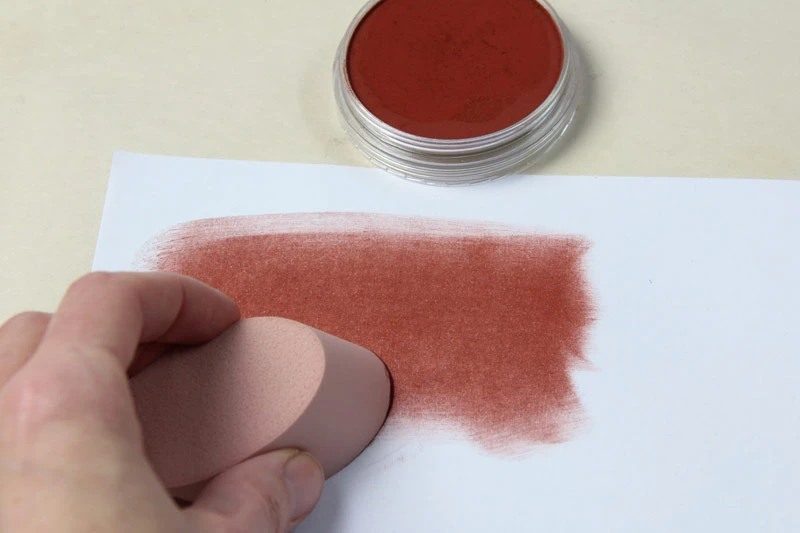
Image Transfer
Easily transfer a drawing or image using PanPastel. A quick and easy alternative to using transfer paper.
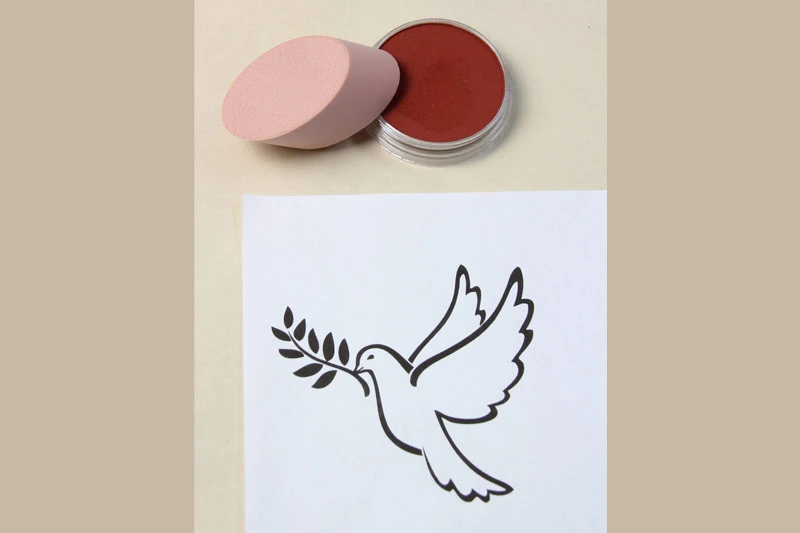
Step 1: On reverse side of image - cover with a PanPastel earth color. Shown Red Iron Oxide Shade (380.3)
Step 2: Print image onto lightweight paper. (E.g. photocopy paper).
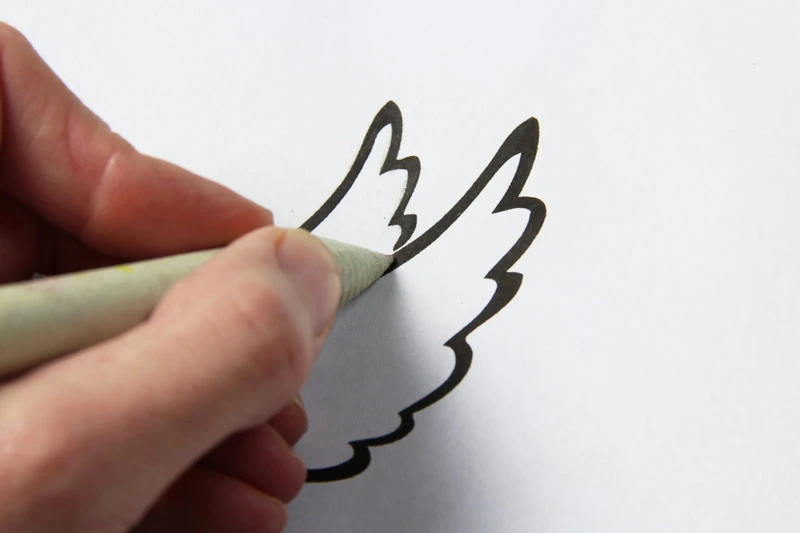
Step 3: Place image, right side up, on top of desired transfer surface. Using a blunt tipped instrument, trace carefully along outline of printed image.
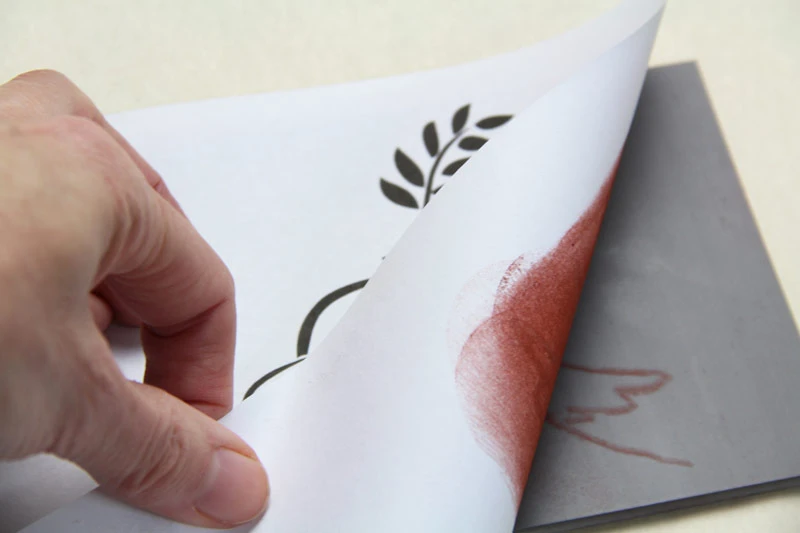
Step 4: Lift paper. Image is now transferred to the desired surface.


